How to Draw Mermaids
Artist Dani Puente teaches you how to draw two types of mermaids: a simplified mermaid with flat colors, and a fully-textured and rendered realistic mermaid.
Contents
1. Introduction
Many cultures believe that among us live mysterious beings that live just out of sight like gnomes, goblins, fairies, trolls…
Today let’s give free rein to our imagination to capture the legend of one of these incredible creatures on canvas. We will dive into an underwater world to create one of the most famous mythological creatures in history: the mermaid.
In this tutorial I will show you how to draw them from scratch and how to make the combination of a woman and a fish as believable as possible. We will make two versions: the first one is simpler and easier, with flat colors and fewer details, suitable for beginners. The other design is a little bit more complex, with more elements, textures and colors – more suitable for experienced artists.
Are you ready? Let’s get started!
2. Concept art
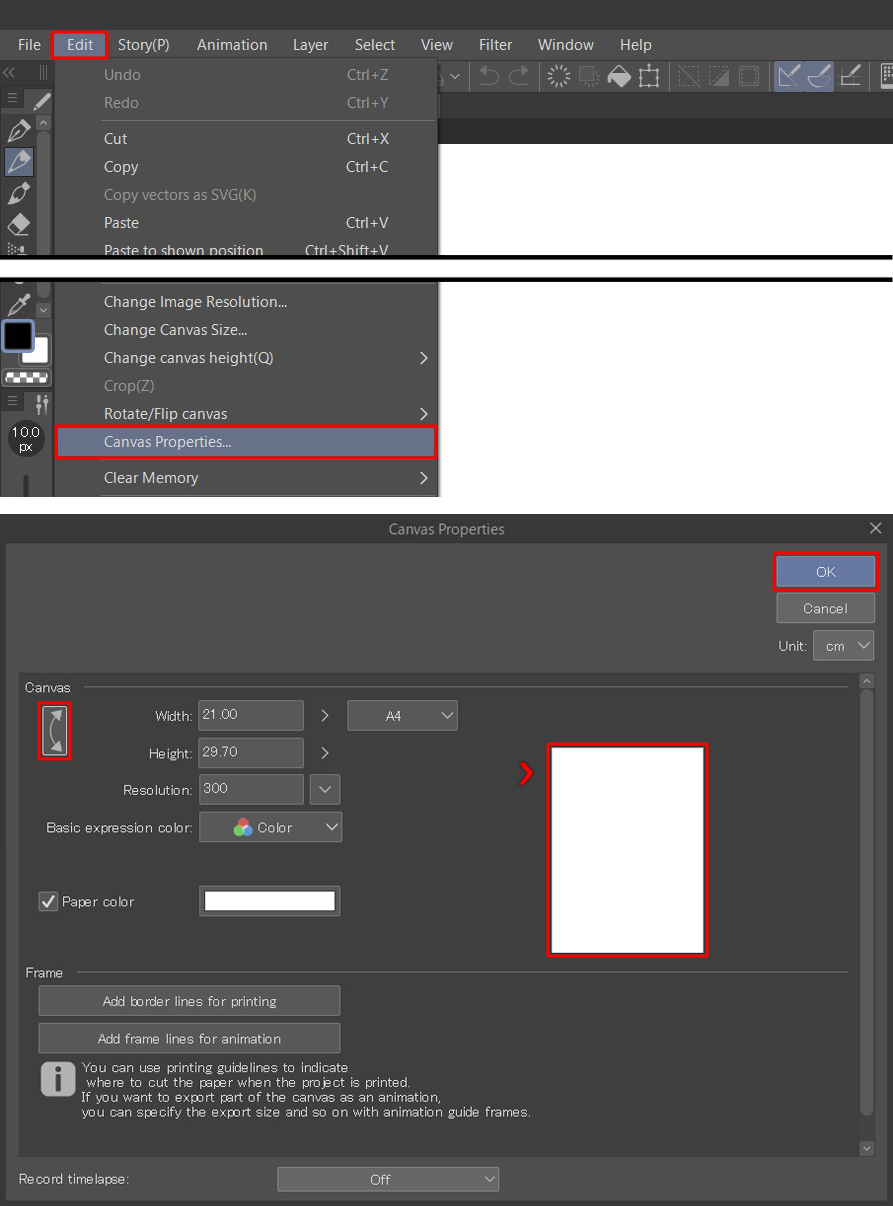
Start by opening the Clip Studio Paint app and create a new A4 horizontal document at a resolution of 300. This is so you can print it if you end up really liking it.
File > New > Canvas > A4 > OK

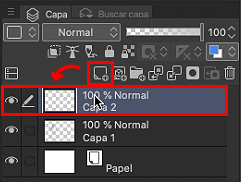
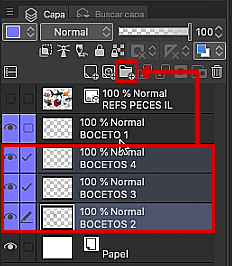
Now, let’s get to sketching with the Pencil > Real Pencil tool in blue. For this project, we’ll sketch three different ideas. I would suggest that you to draw each of them on a different layer by creating a new layer from the Layer > New Layer palette before each sketch.
For this step it is essential to make sure you keep lots of references to hand. Get good examples of mermaid illustrations from other artists to get ideas, photos of fish and other marine animals. Study the colors and shapes of as many existing fish species as you can, along with their fins, scales, gills, etc. All this will give your designs an edge when it comes to detail and realism, as well as being a source for new ideas.
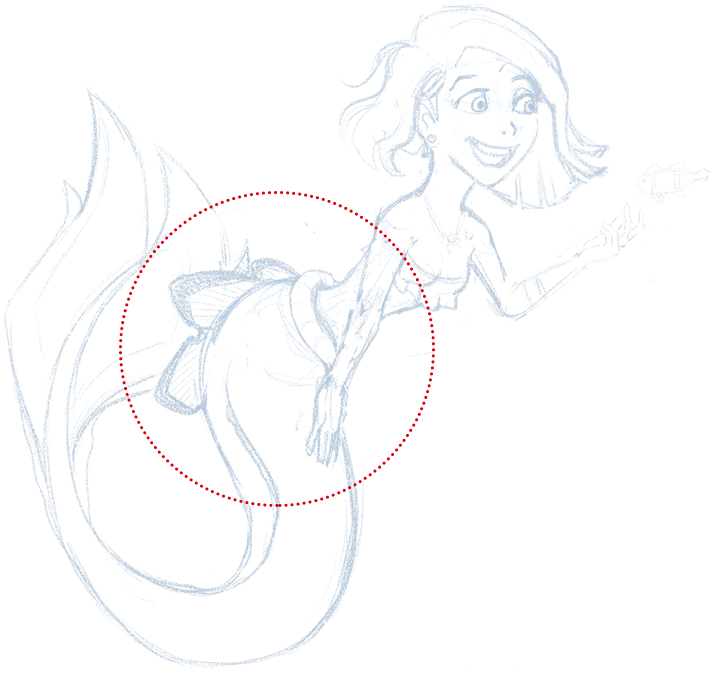
Keep in mind the anatomy of these animals: the position of the fins and how they are attached to the body, the shape of the gills and where they are. A good way to merge these shapes with those of a human is to take advantage of the shape of the human hip as the integration point with the animal’s body, like below.
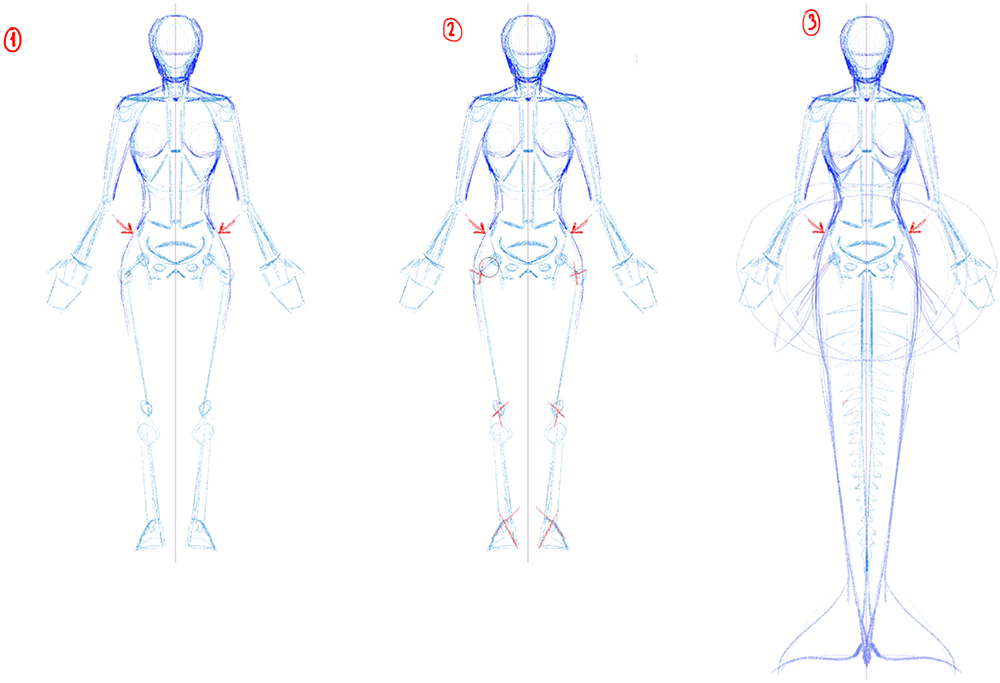
In the human figure (1), the main leg bone (the femur) comes out of the coxal bones of the pelvis (marked with red arrows). But as we know, mermaids would not have those bones as they lack legs. Therefore, all those bones and joints would disappear (2) and instead a second spine would go on down as the main structure of its fish tail, ending in a large caudal fin and topped on the sides and in the rear area by the other, smaller fins (3).
Now that we are clear on the theory, let’s apply it to our sketches. Let’s sketch some ideas and choose the mermaids we will go on to develop from them.
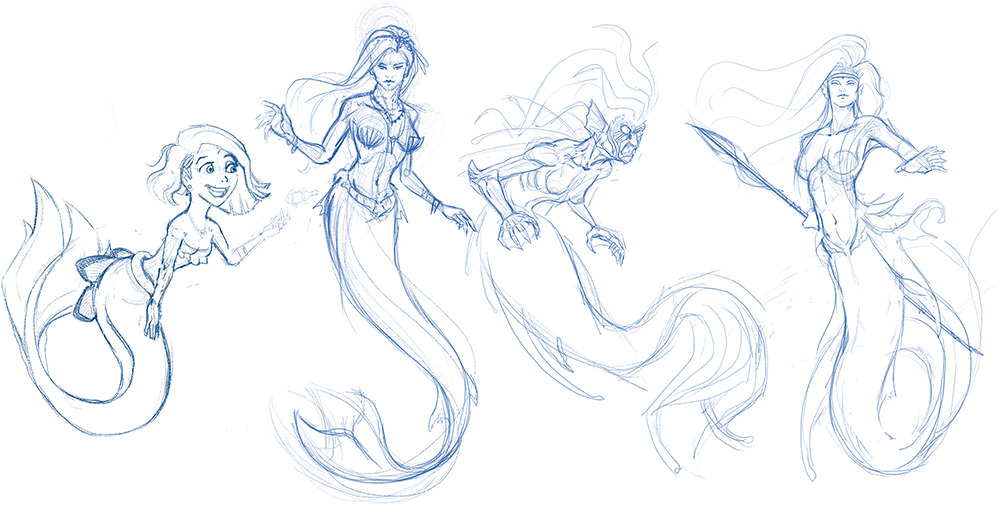
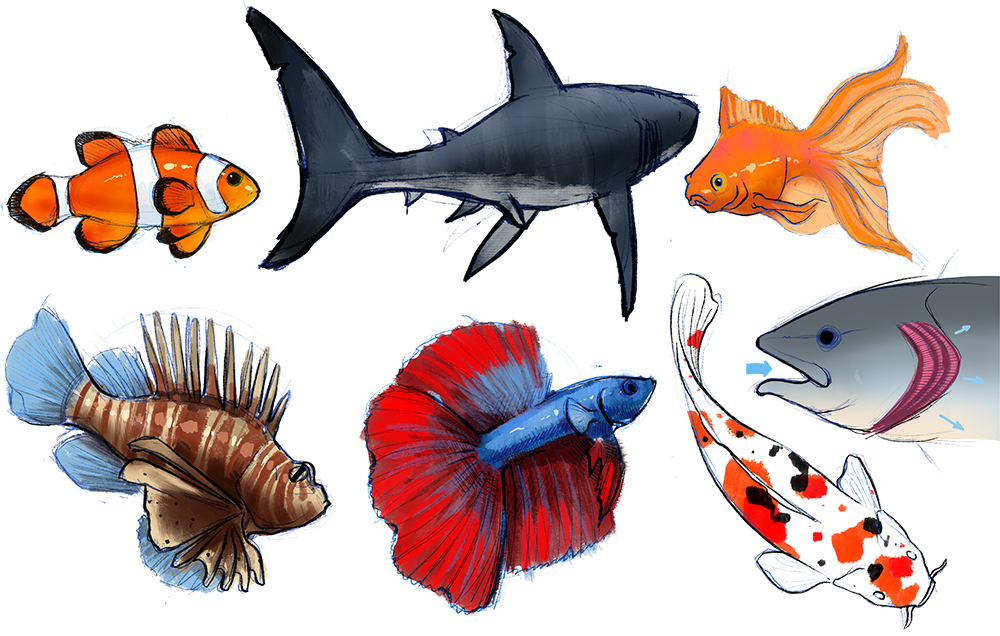
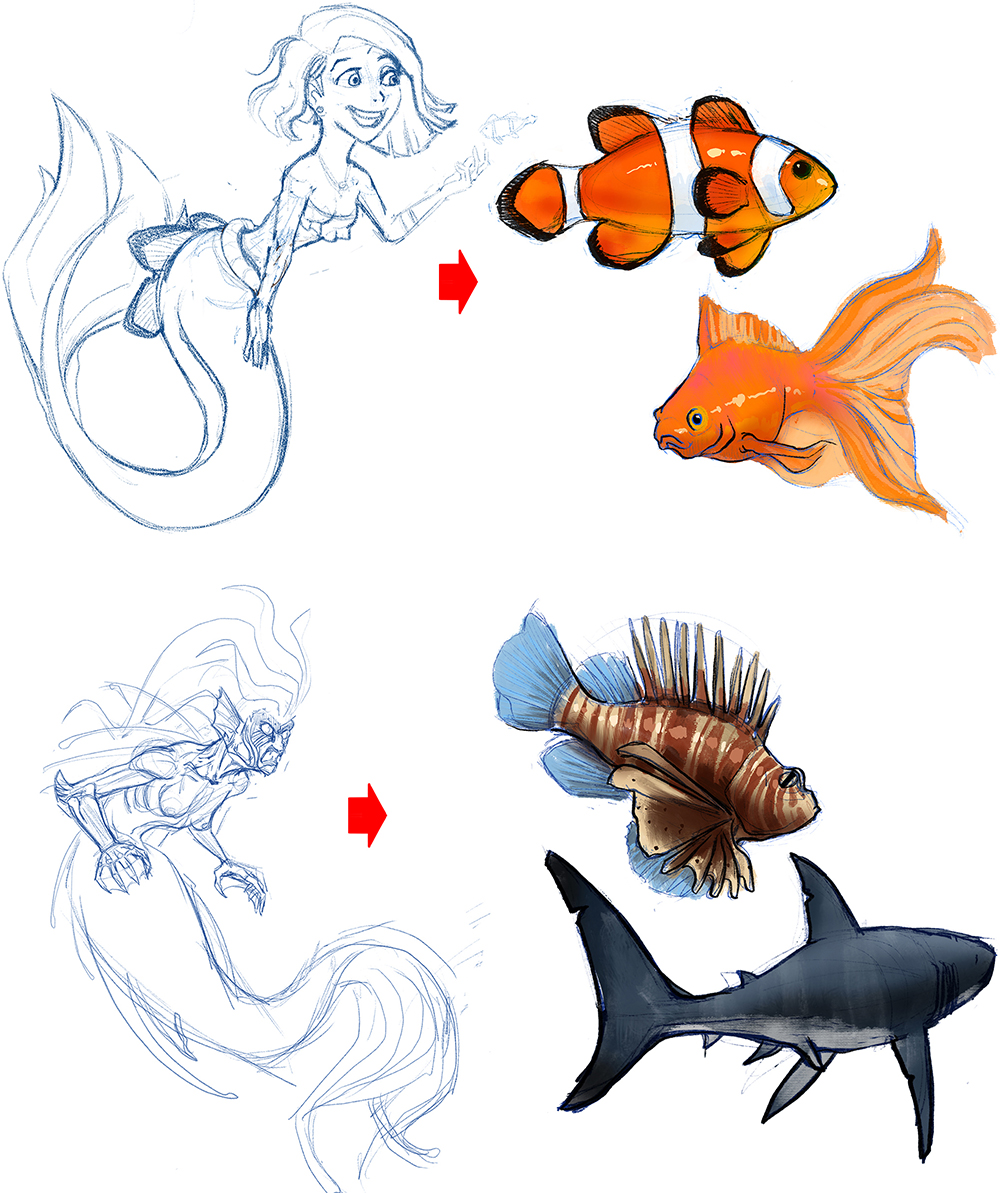
Choose which fish you take references from. If your character is calm, nice, friendly, and peaceful use fish with those characteristics as your references. Animals like a whale, clownfish (Nemo), or goldfish. However, if your character is evil and violent, choose predatory, aggressive, or poisonous marine creatures as your references. For example, a shark, lionfish, or lanternfish.
Now, with the sketches done and before starting on your cleaned-up art, rotate the A4 canvas so that it is vertical (portrait).
Note
You can move the rest of the sketch layers into a folder. To do this, select the layers and drag them to the Create folder icon in the Layer palette.
To rotate the canvas:
Edit > Canvas Properties
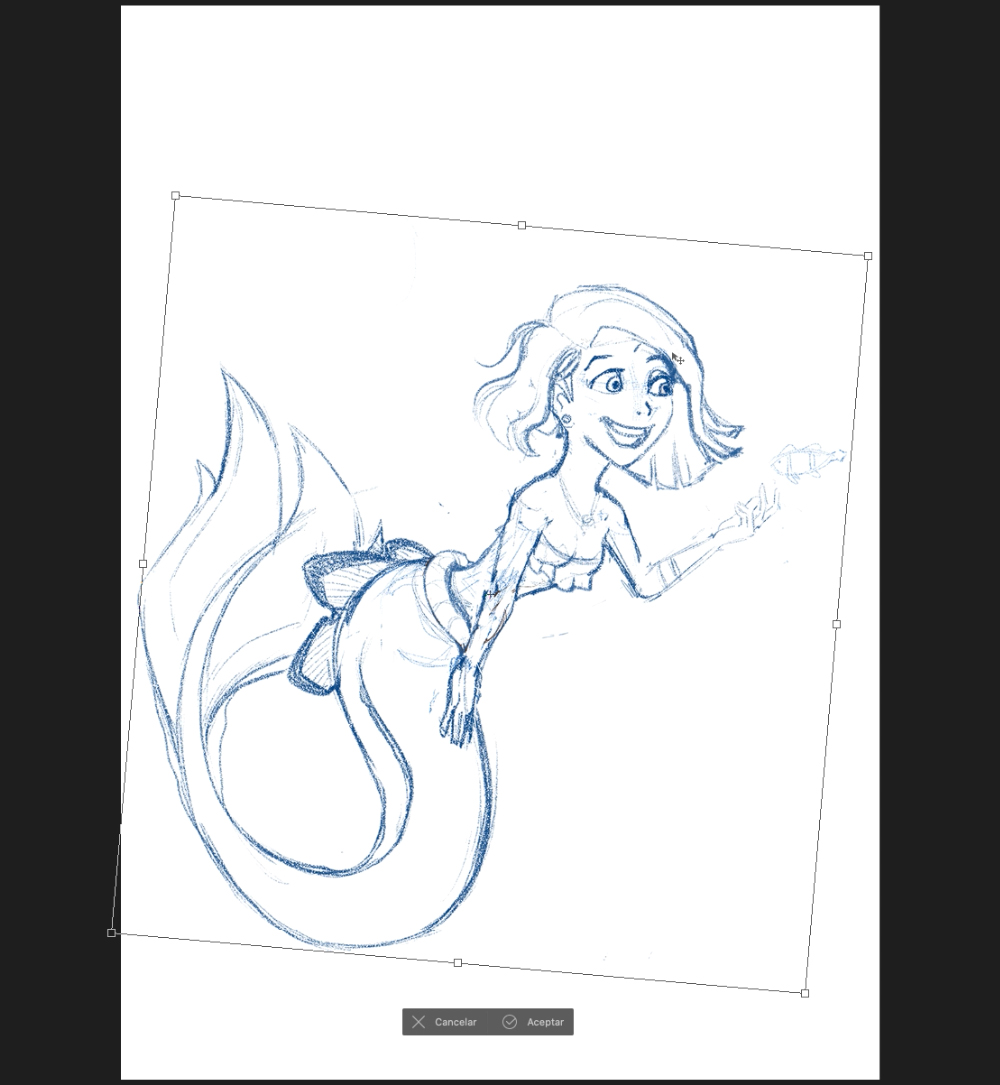
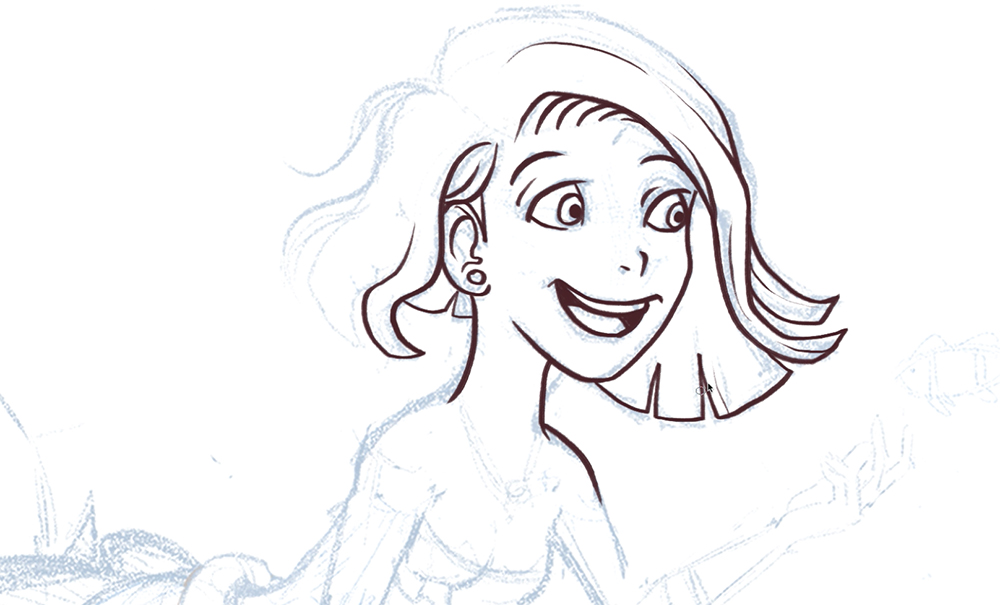
I want to use the first sketch for my first mermaid illustration, so I select the sketch 1 layer and transform it (Cmd/Ctrl + T or Edit > Transform) to center it on the canvas.
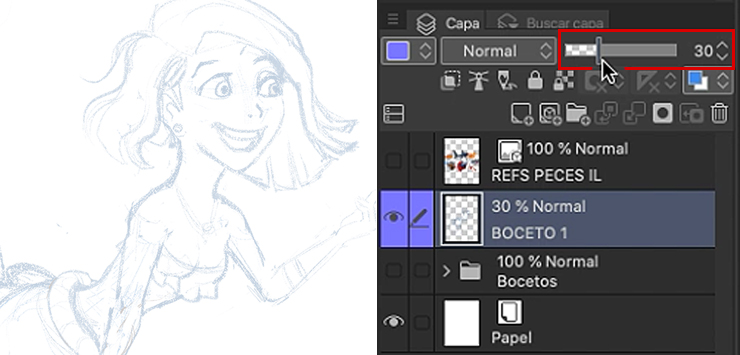
Finally, lower the opacity of the “Sketch” layer to 20-30% to partially hide it and use it as your guide in the next step.
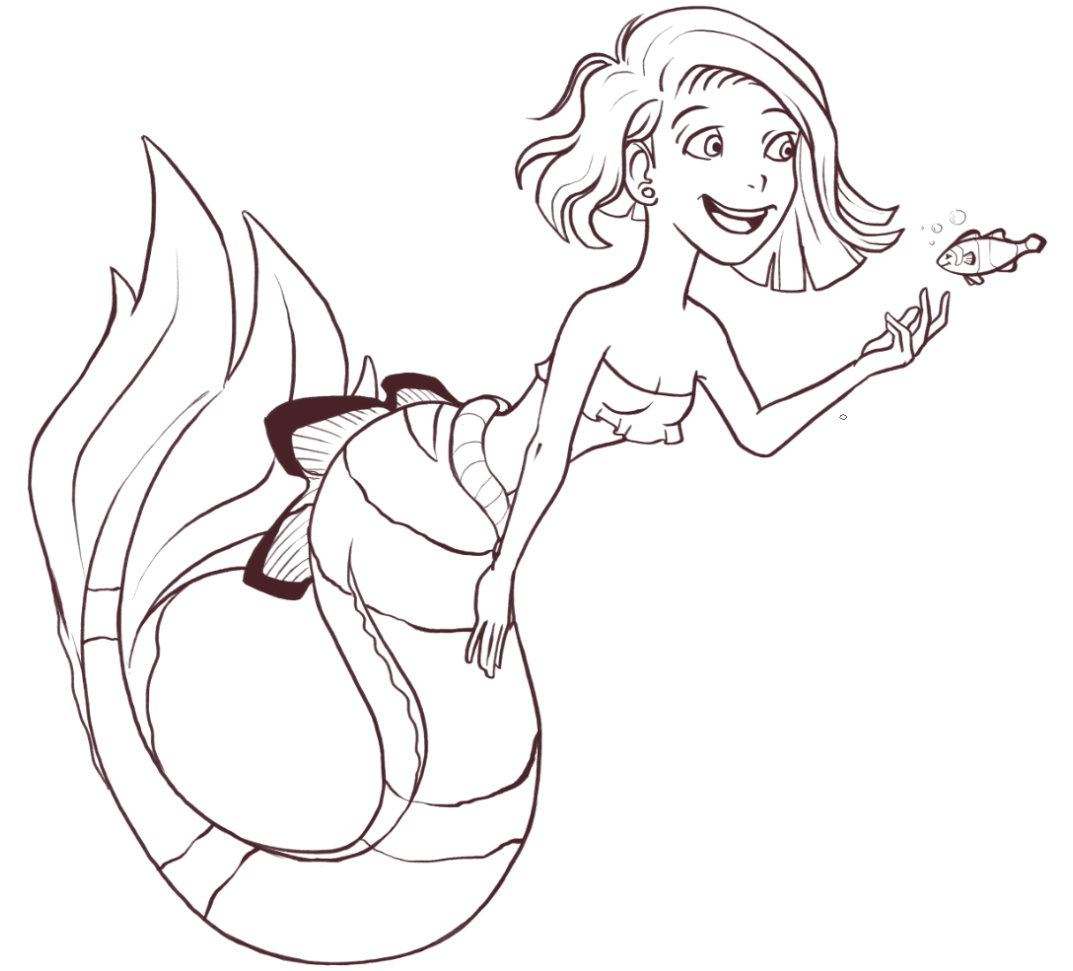
3. Line art
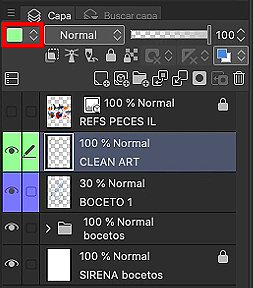
In this step, we will work on the line art and clean it up. Start by creating a new layer named “Clean art”.
Note
To keep your workspace organized, I recommend you assign a color to each layer and create a color coded guide for yourself.
Then, get to work with the India ink > Rough tool.
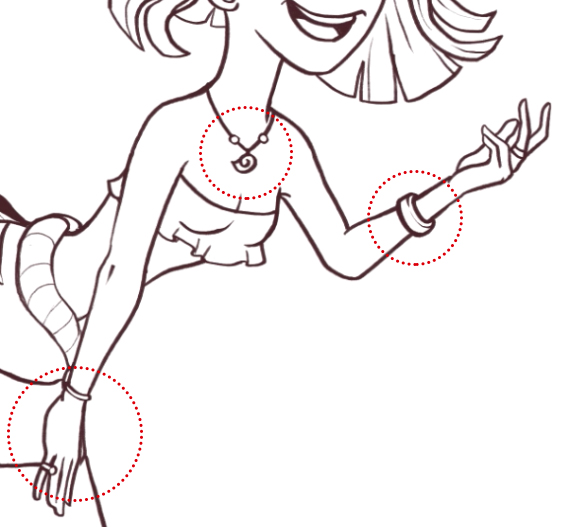
4. Accessories and details
Now, to improve the design of your character, add some small accessories, such as bracelets or pendants. Don’t forget to stop from time to time to analyze your character and consider whether it needs any more details.
5. Color
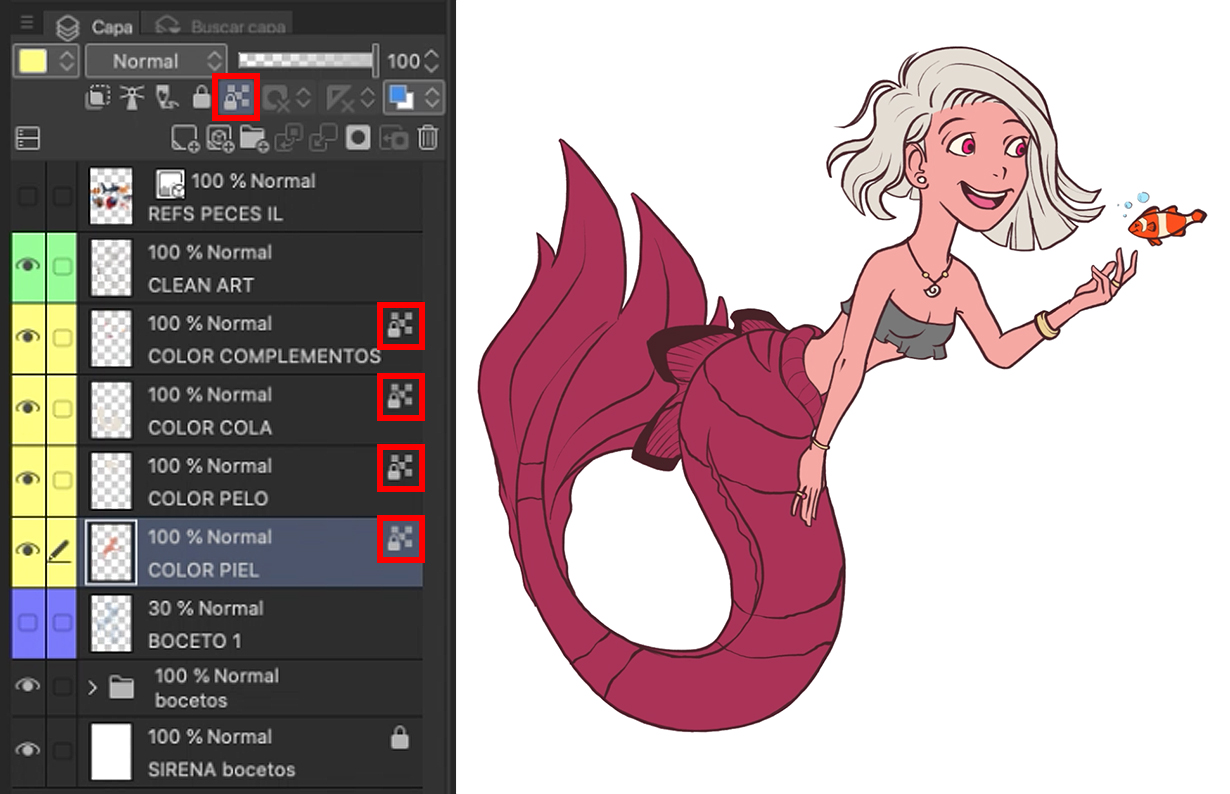
It is very important to work in an organized way for this step, and keep in mind that the color of each part of the mermaid’s body will require a different layer. I will use the same tool on all of my layers: Pen > G-pen.
The first layer will be “Skin color”, which we will place under the “Clean art” layer. Same goes for all other layers moving forward.
The workflow is the same for all the other layers. As you can see in the image below, each part of the mermaid is colored in a different layer.
Note
I recommend you click on the Lock transparent pixels button so you don’t paint outside the lines.
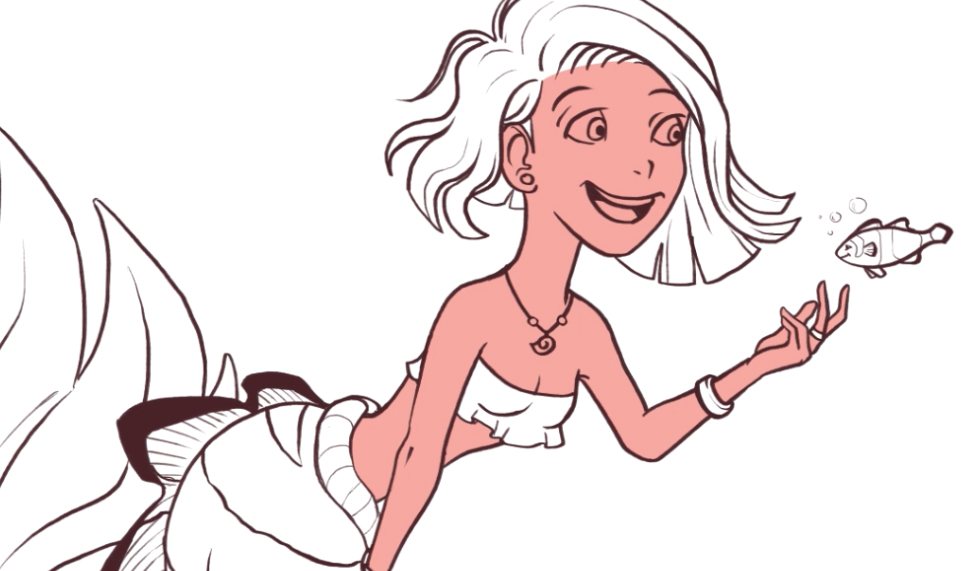
6. Highlights and shadows
At this point, it is really handy to have the Lock transparent pixels button that I told you before enabled, because now it’s time to start adding highlights and shadows to our mermaid.
Let’s start with the “Skin Color” layer. Paint the shadows with a color a little darker than the skin base color with the light coming from the top-right. Do the same for the highlights, using a slightly lighter color.
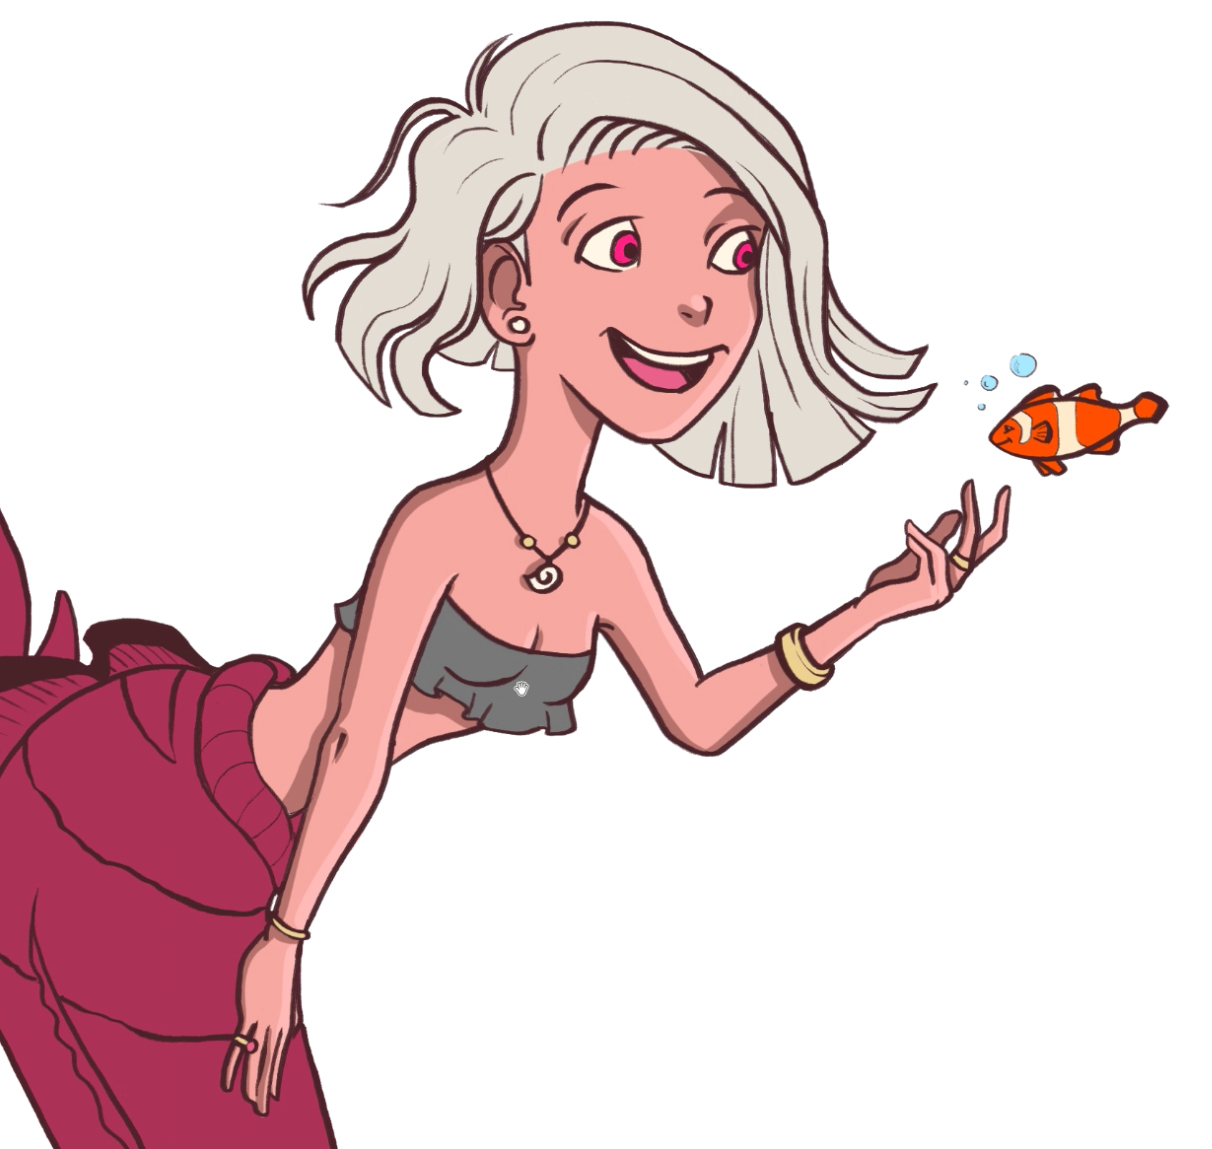
Follow these steps for each layer for a result like this:
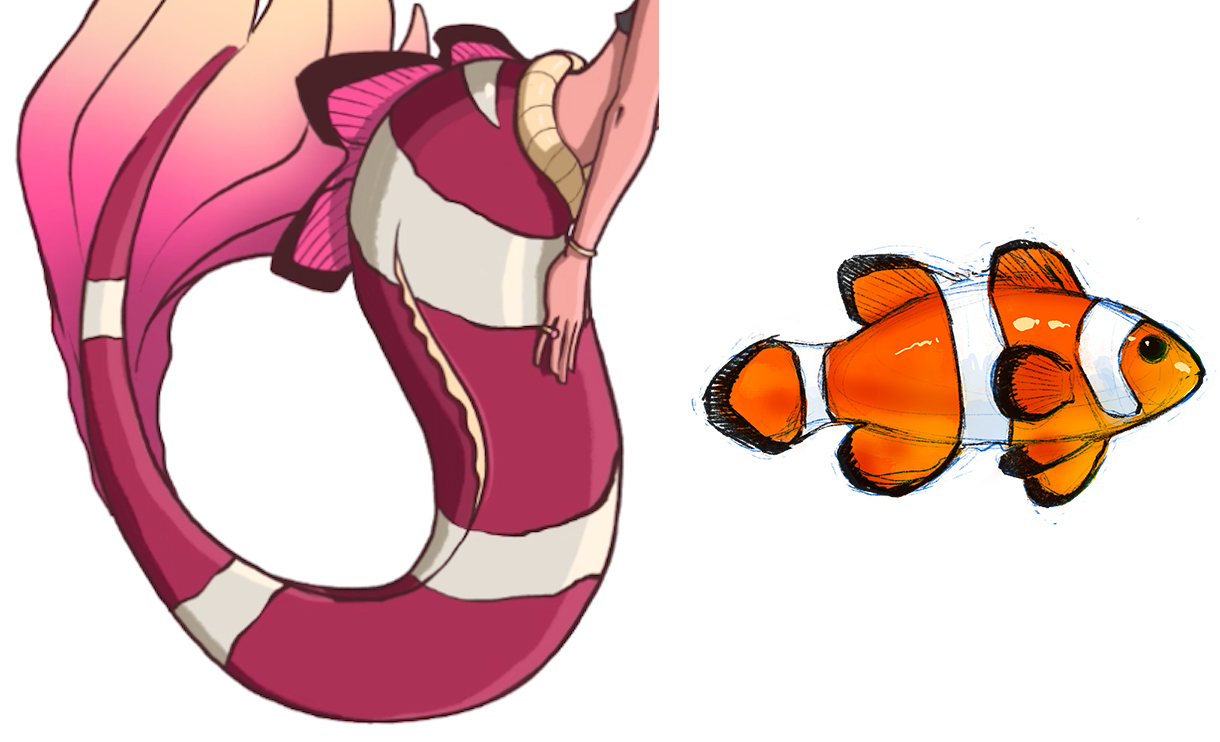
Note
Using the clownfish as a reference, I added a similar pattern to our mermaid’s tail, combining wide gray stripes with the base maroon color.
7. Finishing touches
Now, to add the finishing touches to our design, I will take advantage of the free possibilities that Clip Studio provides. This step is optional, so if you prefer to skip it, go directly to the next step.
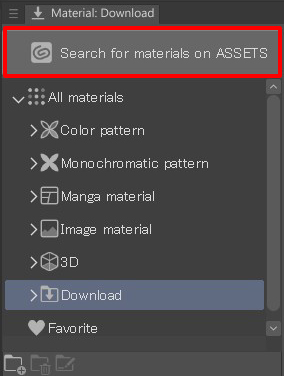
Now, in a few simple steps we’ll download a scale brush to add some texture to the tail. Open the Material > Download palette. If you can’t find it, go to the top Window menu > Material > Material [Download].
Then, click the Search for materials on ASSETS button to open the Clip Studio app and search for the material we need:
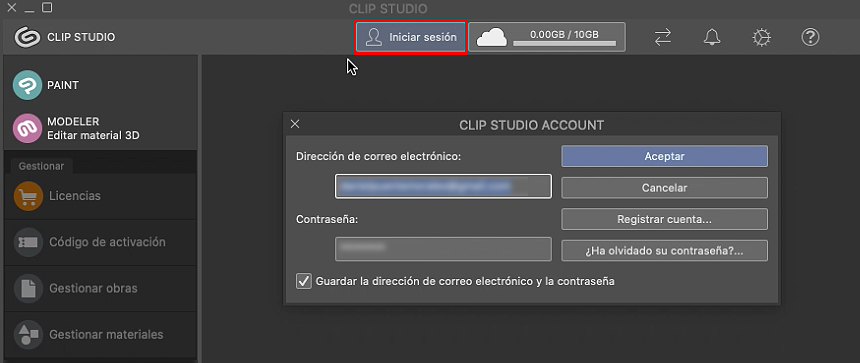
After launching Clip Studio, log in with your username and password.
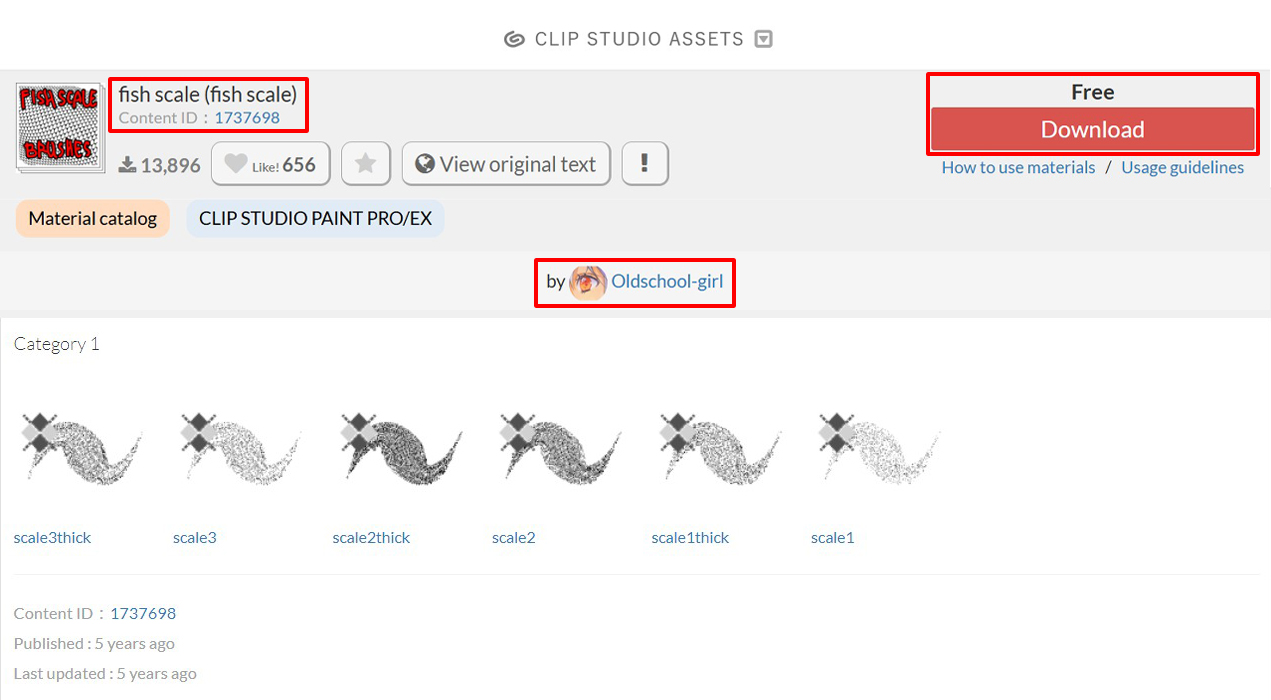
Make sure that in the left column the CLIP STUDIO ASSETS box is checked and search for “scales”.

There are many free materials. Choose the one you like and click Download:
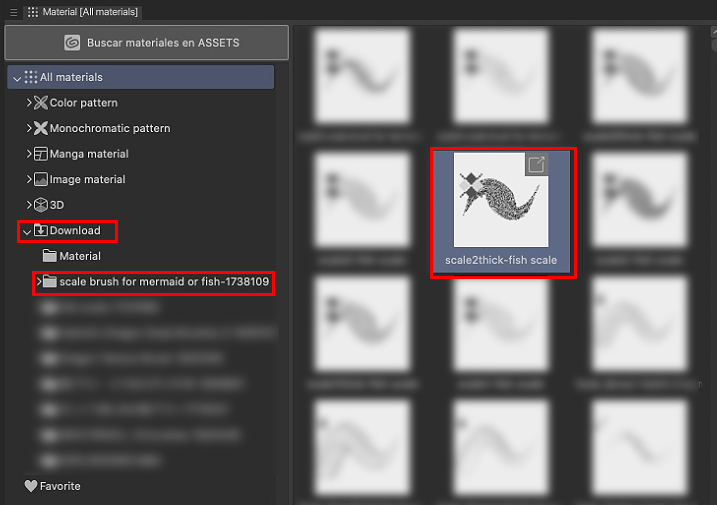
Go back to Clip Studio Paint. The new material should now be in the Material palette. To use it, just drag and drop the downloaded material into a Sub Tool.
Once you have followed these 4 simple steps, create a new layer for the texture and draw the shape with your new brush.
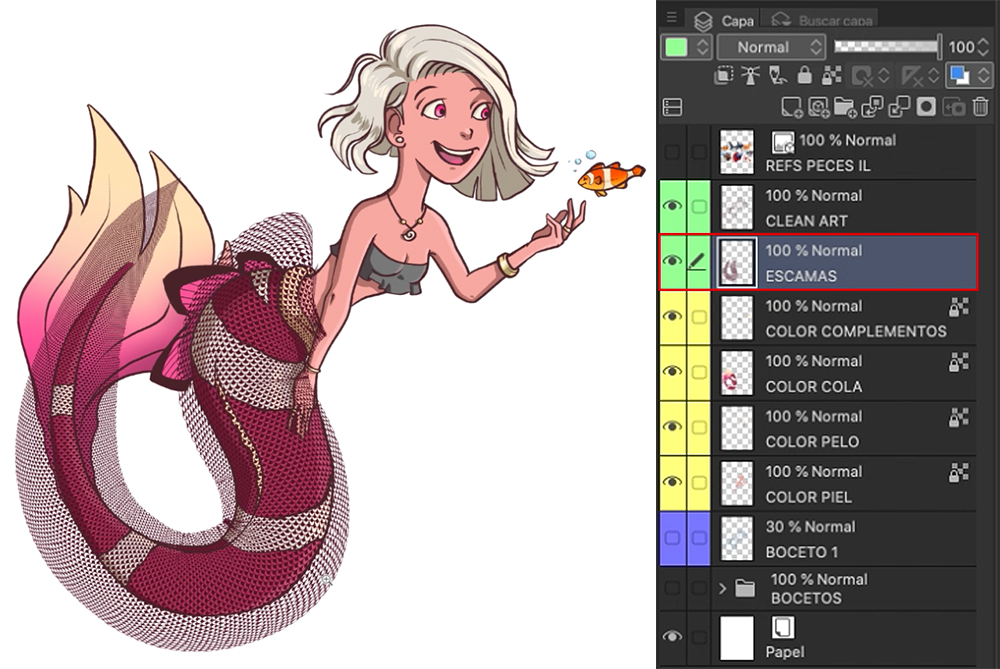
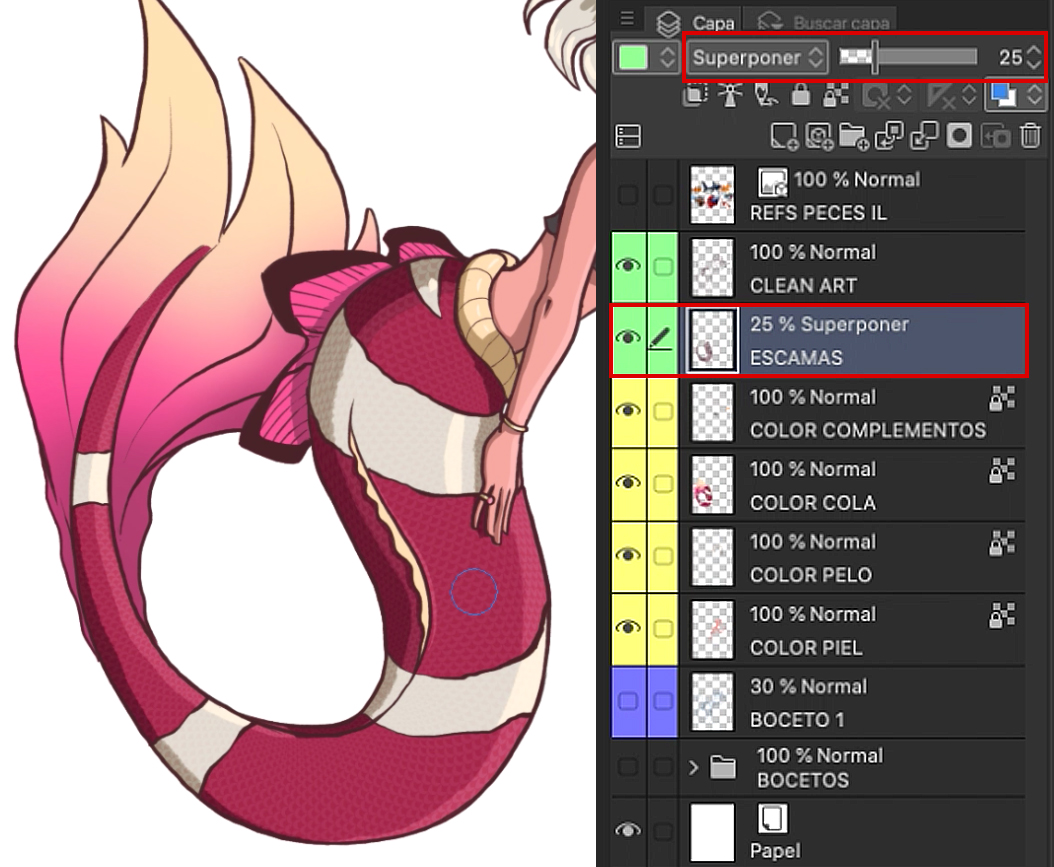
Now, just delete the unnecessary parts with the Eraser tool, lower the opacity to 25% and set the layer Blending mode to Overlay so that the texture doesn’t stand out too much.

Note
You can download the material I used in this tutorial here: https://assets.clip-studio.com/en-us/detail?id=1737698
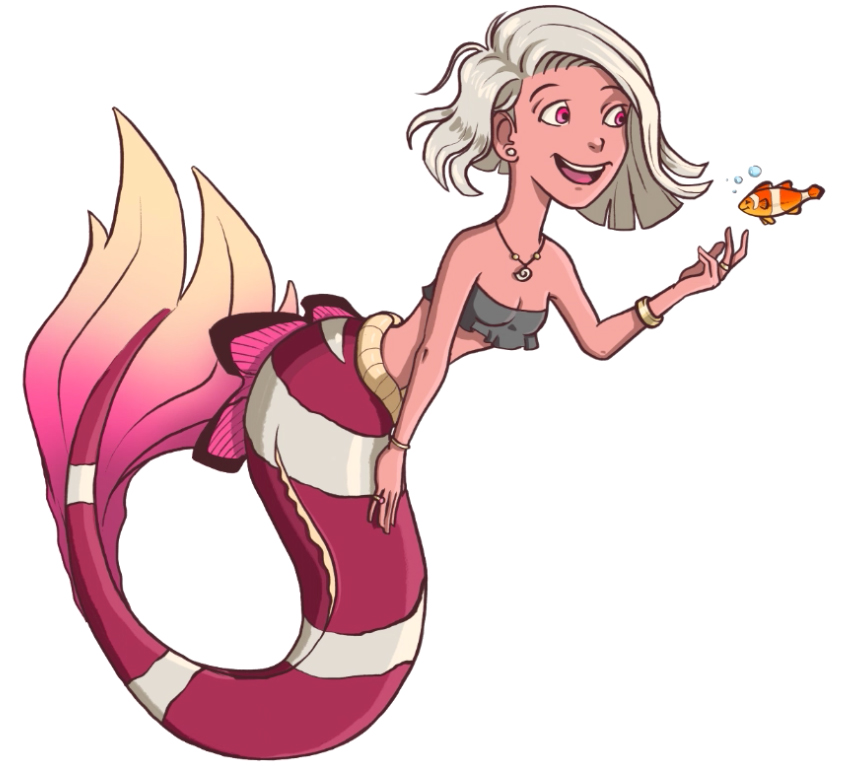
8. Final piece
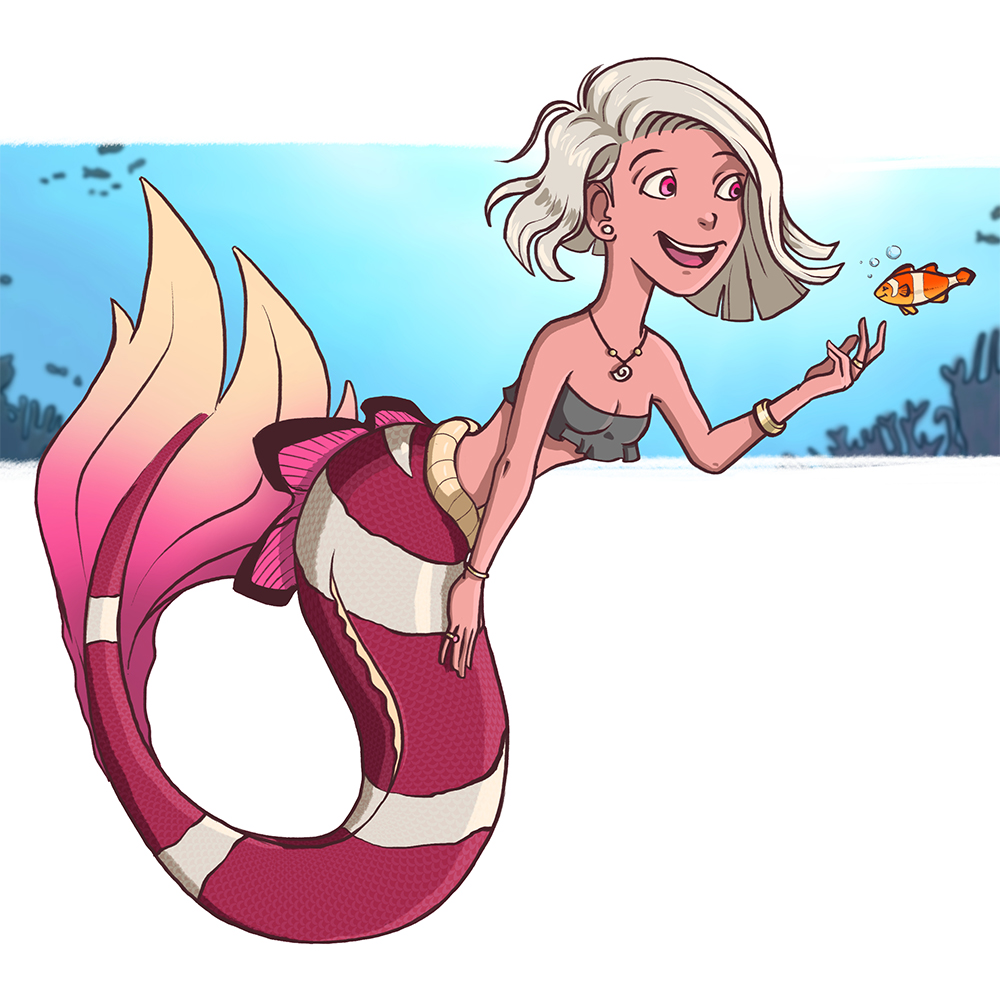
To make the final touches to your character, you can use a simple background that provides context without detracting from the focal point of illustration. As you can see, these seven simple steps have been enough to create a fantastic mermaid from scratch.
I’m sure you found that pretty easy. Do you feel like kicking it up a notch and finishing one of the other initial concepts we made with a little more complexity? For this new idea, we will follow almost the same steps as with the simple illustration:
- Line art
- Solid base
- Highlights and shadows
- Color
- Details
- Finishing touches
- Final piece
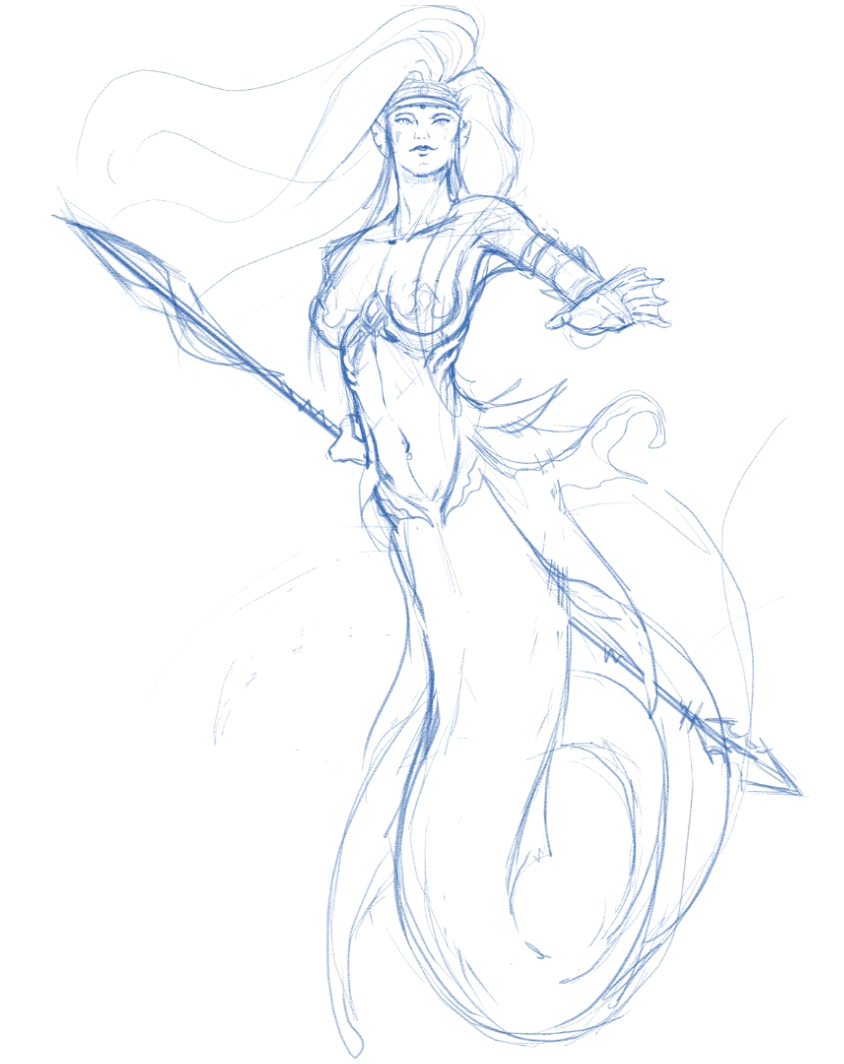
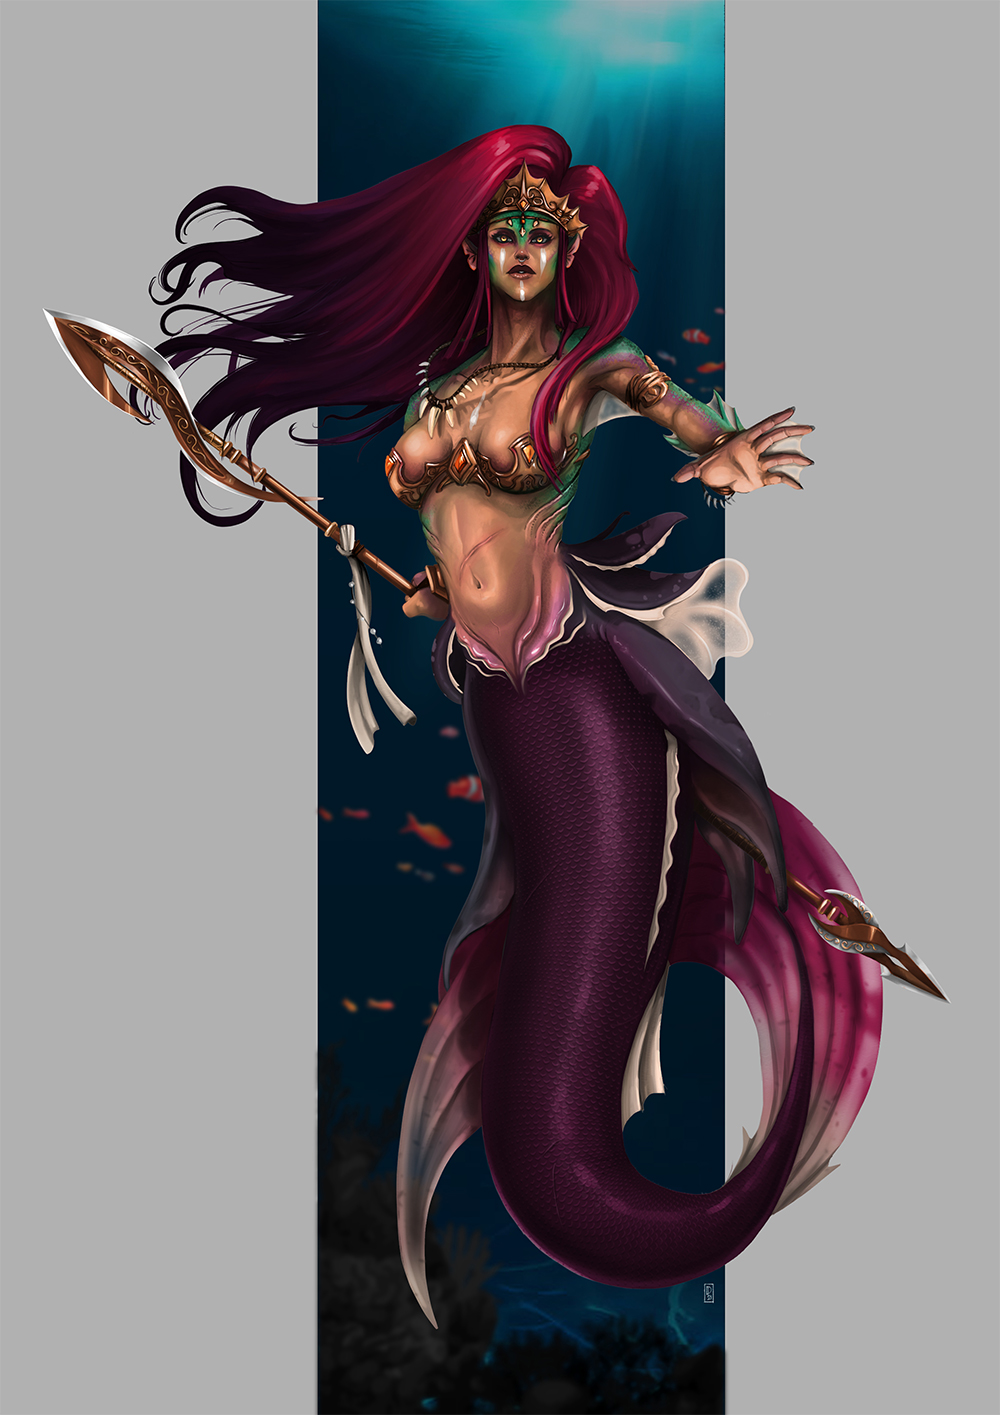
Let’s go back to the previous sketches and use the third idea.
For this concept, I took these animals and their characteristics as my reference: the scales and tail of a goldfish, the fins of a shark and betta fish, and the frills of a jellyfish, creating a character who has a good heart, but is also brave and strong.
Pay attention to the gills. Although they are usually very close to the head of the fish, this time I have placed them on the rib cage, as they fit perfectly with the openings of the ribs, and they also coincide with the location of the lungs, the main organs of the human respiratory system.

To draw the line art, repeat the first mermaid steps: “Sketch” layer at 50% opacity and clean line art on a new “Clean art” layer.
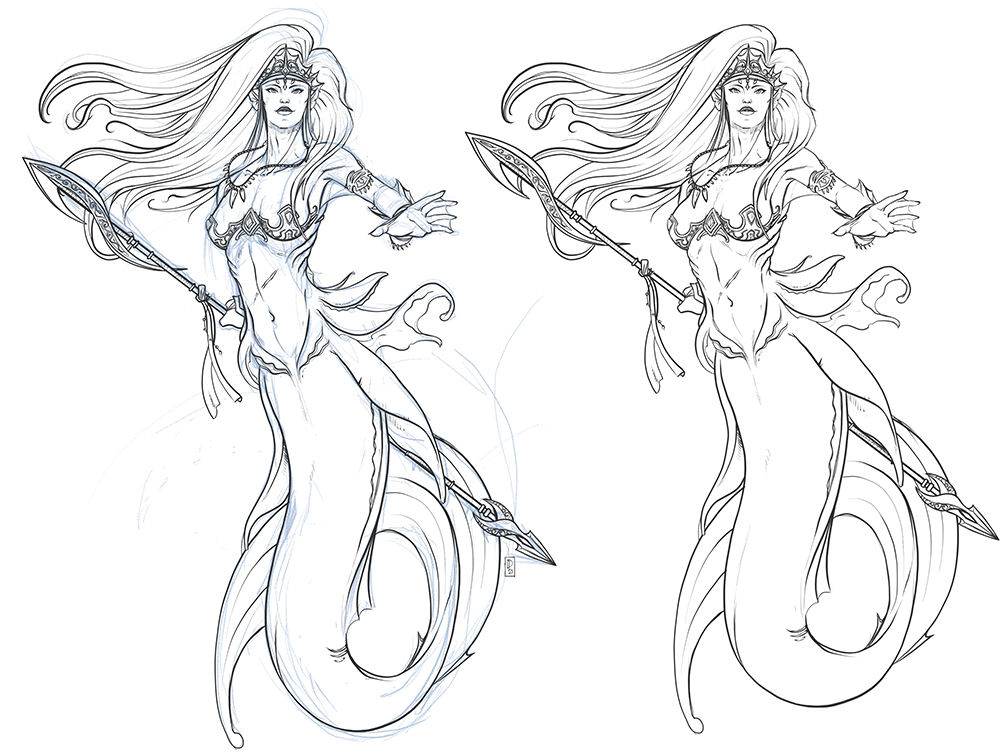
Then, instead of adding the color directly, create a solid gray base under the “Clean art” layer and change the background color to a light gray.
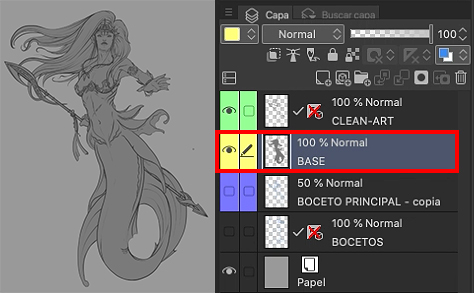
Then, with Lock transparent pixels enabled, add the highlights and shadows on the “Base” layer. Start by painting with simple strokes to place them.
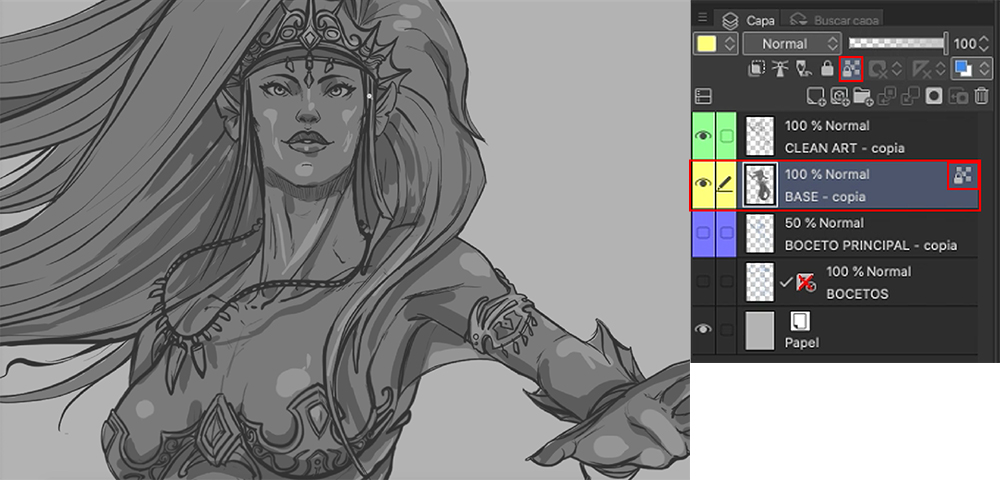
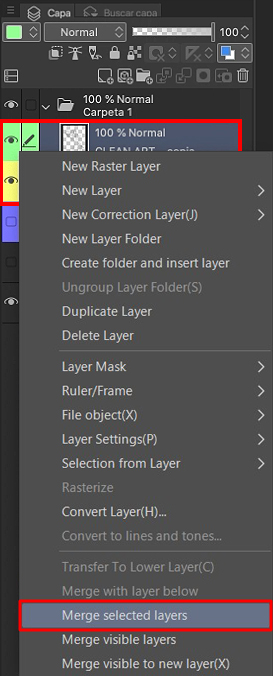
Next, merge the “Clean art” and “Base” layers, although I recommend duplicating them first to have a backup in case something goes wrong. Now select both layers while holding down the Cmd/Ctrl key and right click to choose Merge selected layers.
For the next step, we will use the Brush > Watercolor > Smooth watercolor and Emphasizing texture tools. This technique consists of blending the whites and blacks to give volume with grays. It is a long and tedious step, but I’m sure you will get great results with some skill, dedication, and effort.

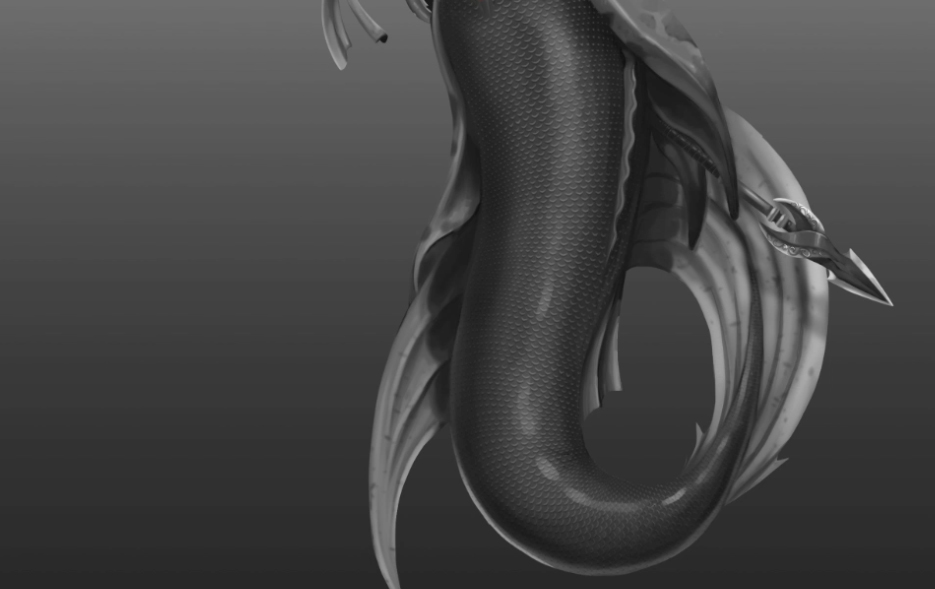
Note on how to add new textures (optional)
As before, we will texture the fish tail using a free scale brush downloaded from Clip Studio Assets. Follow the same steps as for the first mermaid. First, create a new layer on top, apply the texture and delete the unnecessary parts. To achieve a better effect, I duplicated the layer and inverted the black of the first scales, leaving a layer of white scales (moved slightly upwards) and another of black scales. Then I merge both and adjust the opacity to 50%.
The next step is the coloring. Again, each part of the mermaid will be on its own layer, but we will handle this step differently from the first mermaid. Right now, the blending mode of all the color layers is set to Overlay, so they will take on the values of the grays.
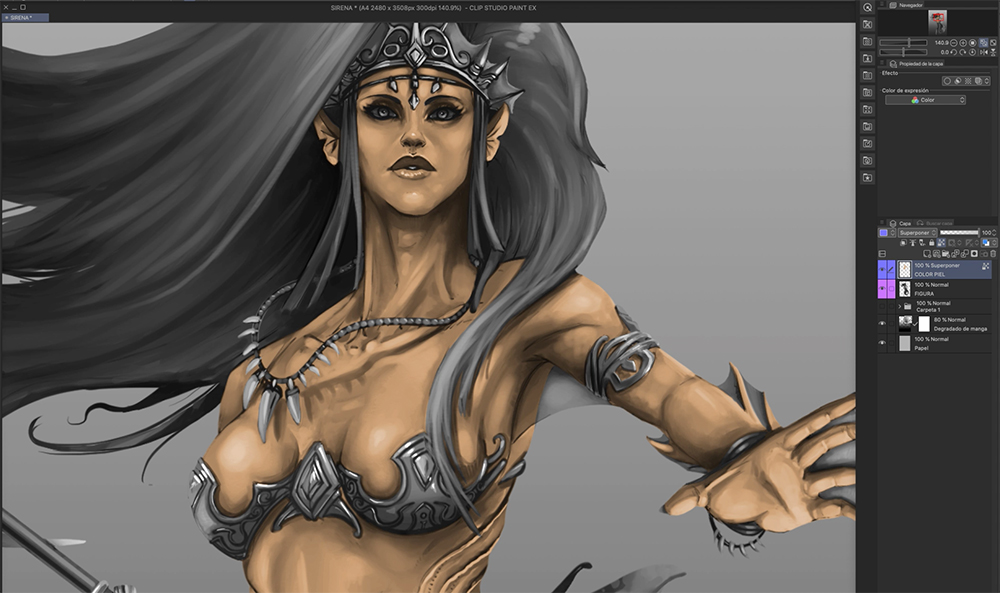
Once you have the base color of the skin finished, enable the Lock transparent pixels button again to apply some “reptilian” shades to the skin with the Airbrush > Soft tool.
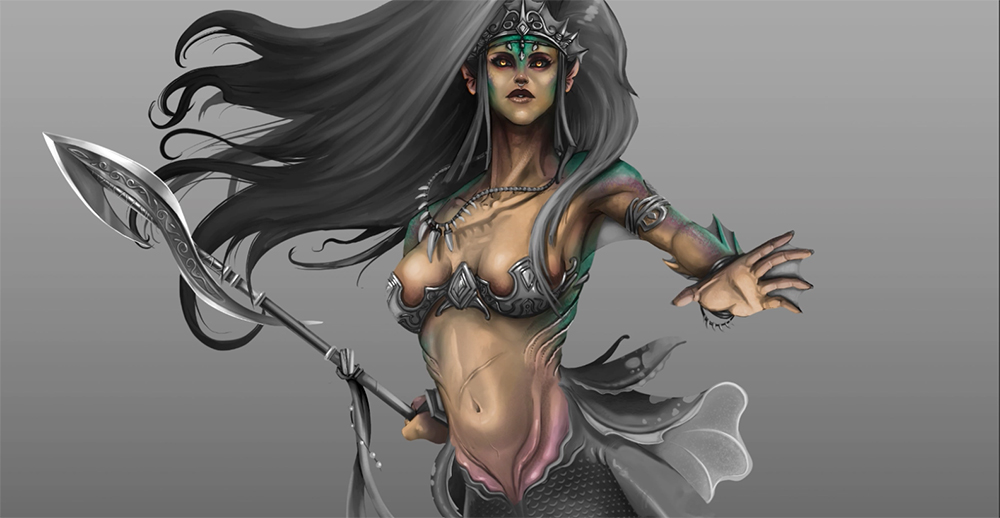
Repeat these same steps with the other elements of our warrior mermaid: hair, tail, fins, spear…
Note
To add the final touches and bring it to life, my recommendation is to unleash your creativity and delve into this fantasy world, taking into account the harmony when applying the colors, small spots or points of transparency in the frills coming from the fins.
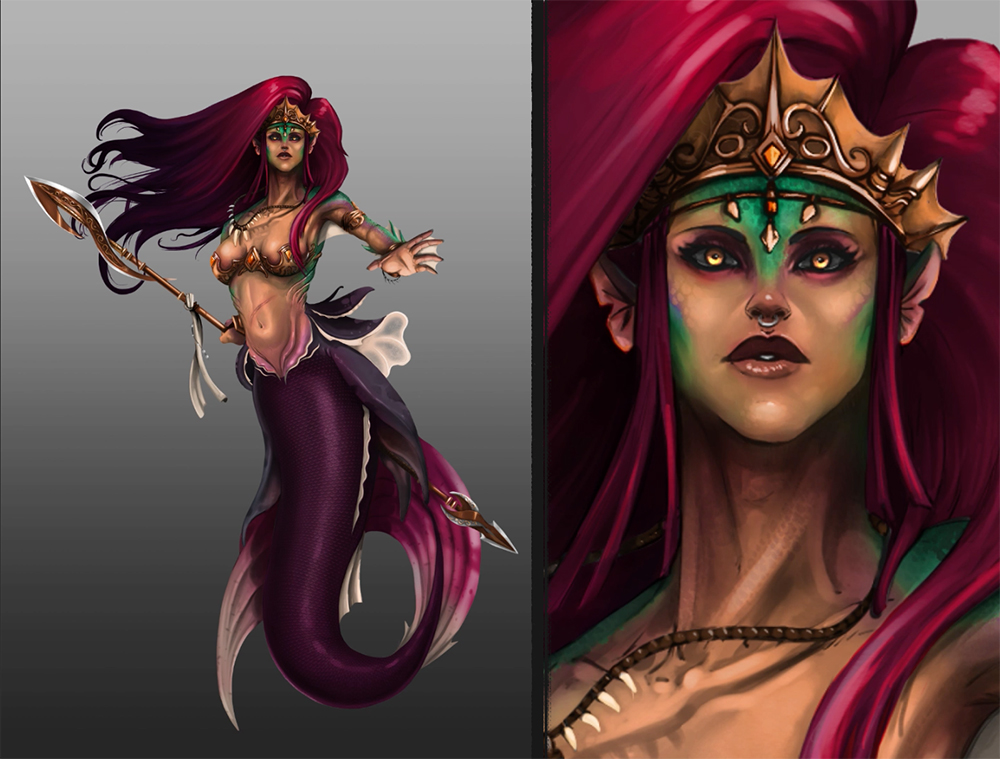
Finally, to have our mermaid ready, we just have have to polish the highlights and shadows a little more, adjust the tones and saturation with a Color Correction layer and add a simple background. This will result in a clean and professional finish.
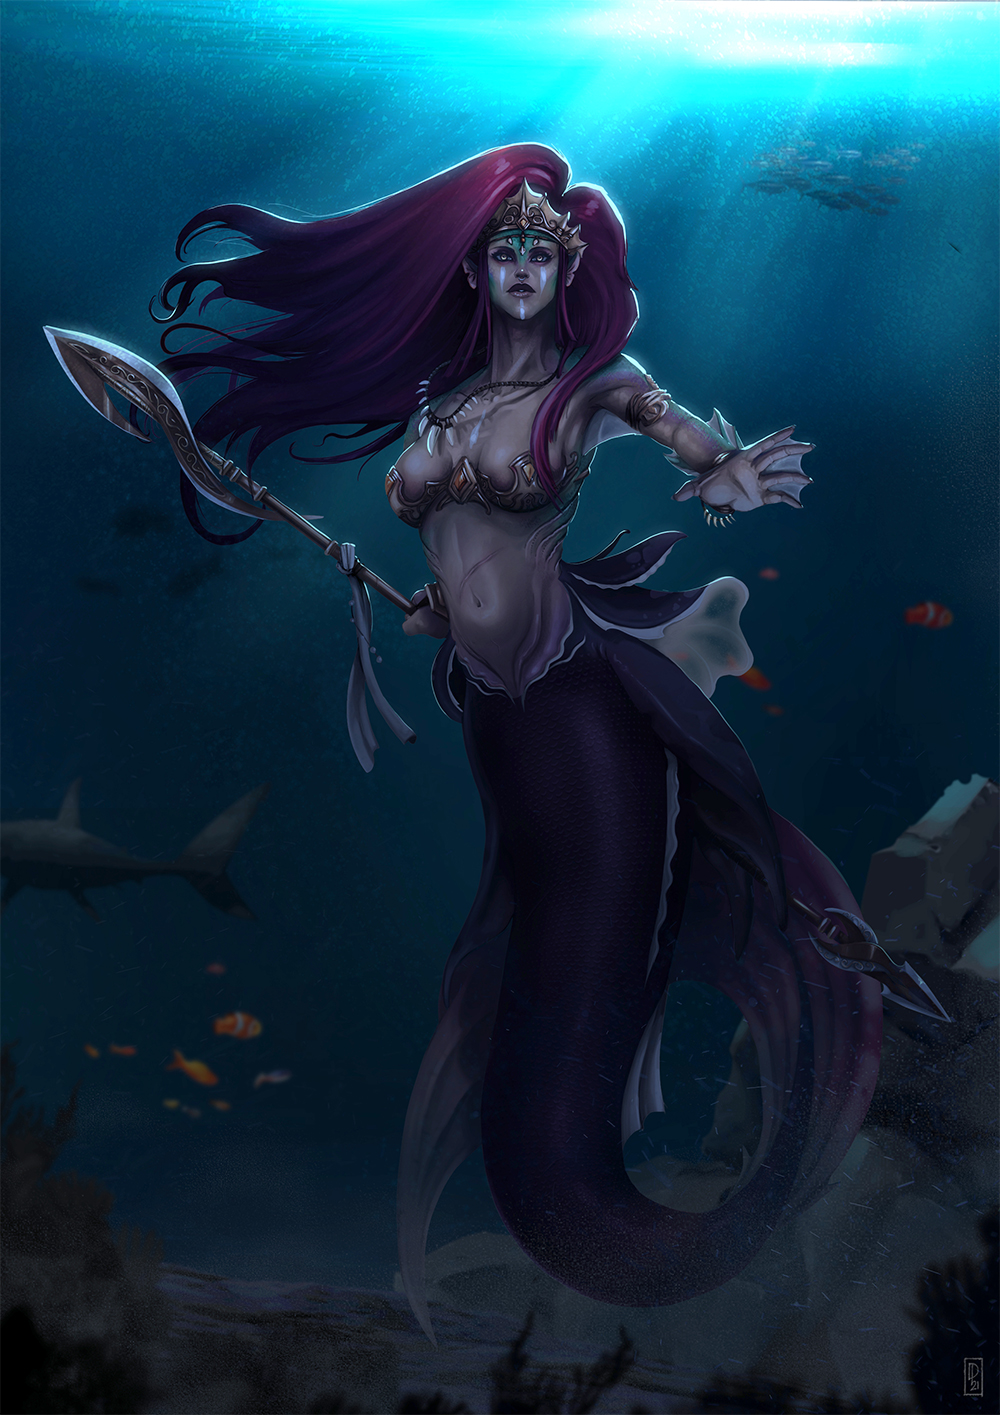
As always, I encourage you to explore and try new ways to improve your illustrations. Until then, I hope my tips will be of great help to you!
That’s all for this time. Don’t hesitate to share notes and illustrations you made with this tutorial with me on Instagram (@Danipuente_conceptart). I would love to see your mermaids!
If you have any questions, feel free to contact me by email: danielpuentemorales@gmail.com.
As always, it’s a pleasure to draw for all of you!