Art Nouveau Style Animation Workflow [Video Tutorial]
Follow along as Michelle Cheng outlines how to create a subtle animation. Using the principles of animation and guiding you through finding the right inspiration - her Alphonse Mucha inspired illustration is bound to get your creativity flowing and tackling this new project with motivation.
Contents
Hi! My name is Michelle and as an animation student, I’m always keen to try out different styles and push my work into new territories.
Today, I’ll be creating a piece based on the prompt: what would the Art Nouveau style look like if it were animated?
To create this piece, I’ll be using Clip Studio Paint EX, because it comes with more robust animation tools when compared to the PRO version. For finishing touches, I’ll be going into Adobe After Effects.
Artist Profile
Michelle Cheng, also known as lemoncholy, is a Toronto/LA based story artist and video creator. Michelle has recently graduated from CalArts’ Character Animation program, and has an interest in filmmaking. In her free time, she creates captivating videos on your YouTube channel that share both her knowledge, creativity, and unique art style with her followers.
Find out more here: https://www.lemoncholy.net/
Instagram: lemoncholy_
YouTube: lemoncholy
Finding Inspiration
When I’m feeling stuck, I’ll turn to either compiling or studying reference material. In my view, there’s a lot of value in studying someone else’s creative decisions; it breaks me out of my own molds.
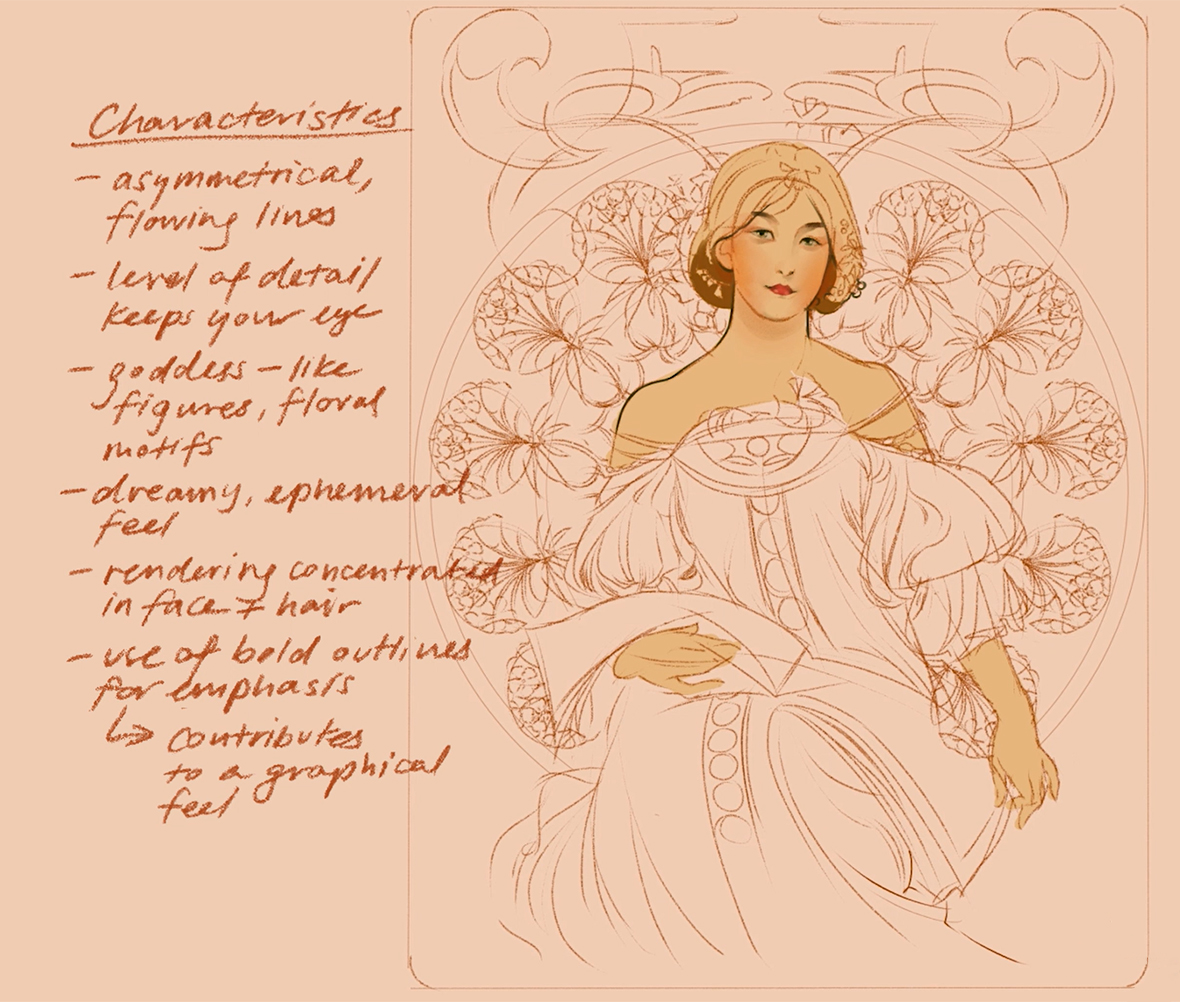
My primary source of inspiration here is Alphonse Mucha, a Czech artist who lived in Paris during the Art Nouveau movement. At the time, however, he preferred to disassociate himself from it because he wanted his art to be “timeless” and not merely “contemporary”.
He no doubt delivered, because I find myself admiring them more than a century later for their otherworldly elegance.
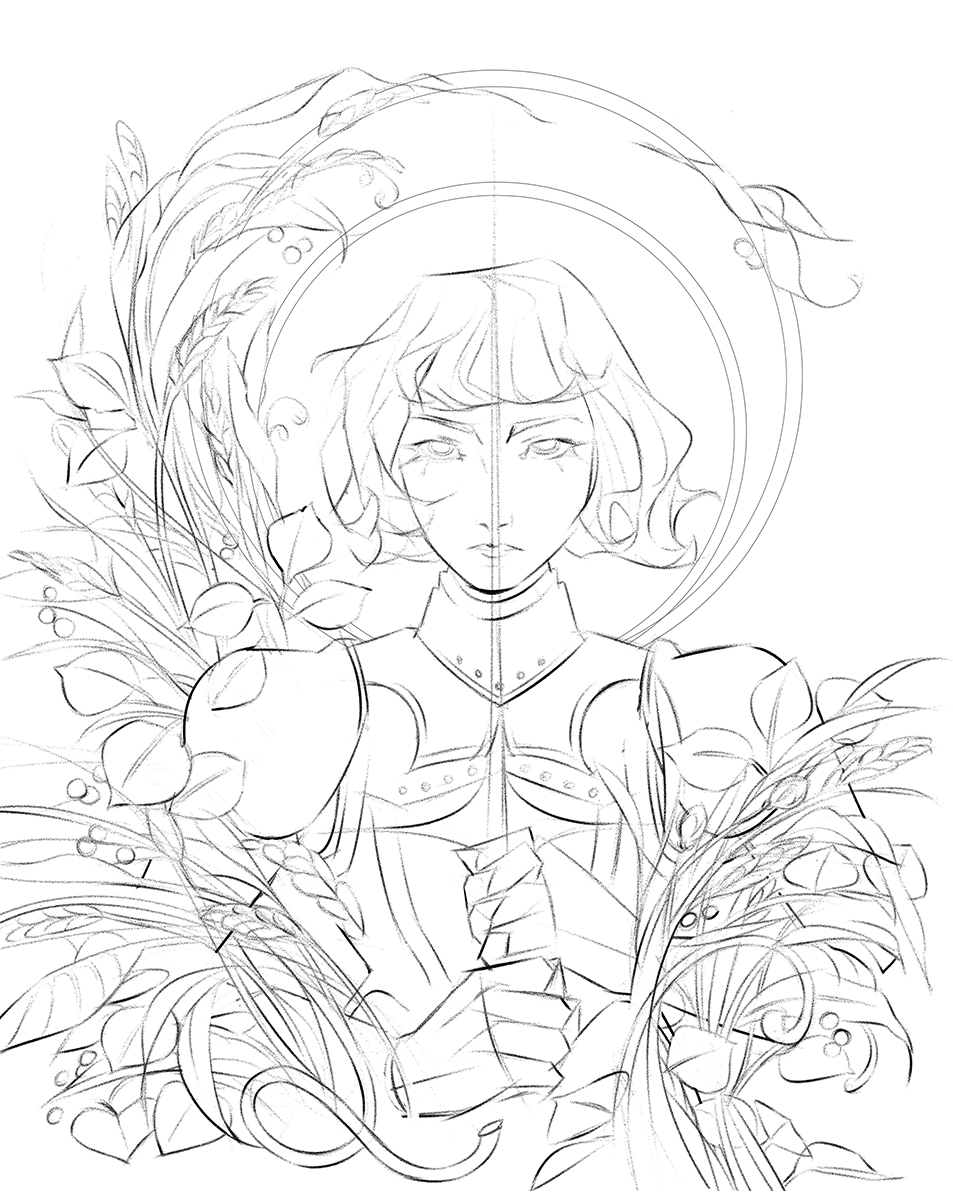
↓Study of “Rêverie” (1897) Alphonse Mucha
While I won’t be following all my notes, the studies do get the ideas going.
Note the elements I’m bringing in from Mucha’s work, namely asymmetrical flowing lines, an abundance of detail, and elegant compositions.
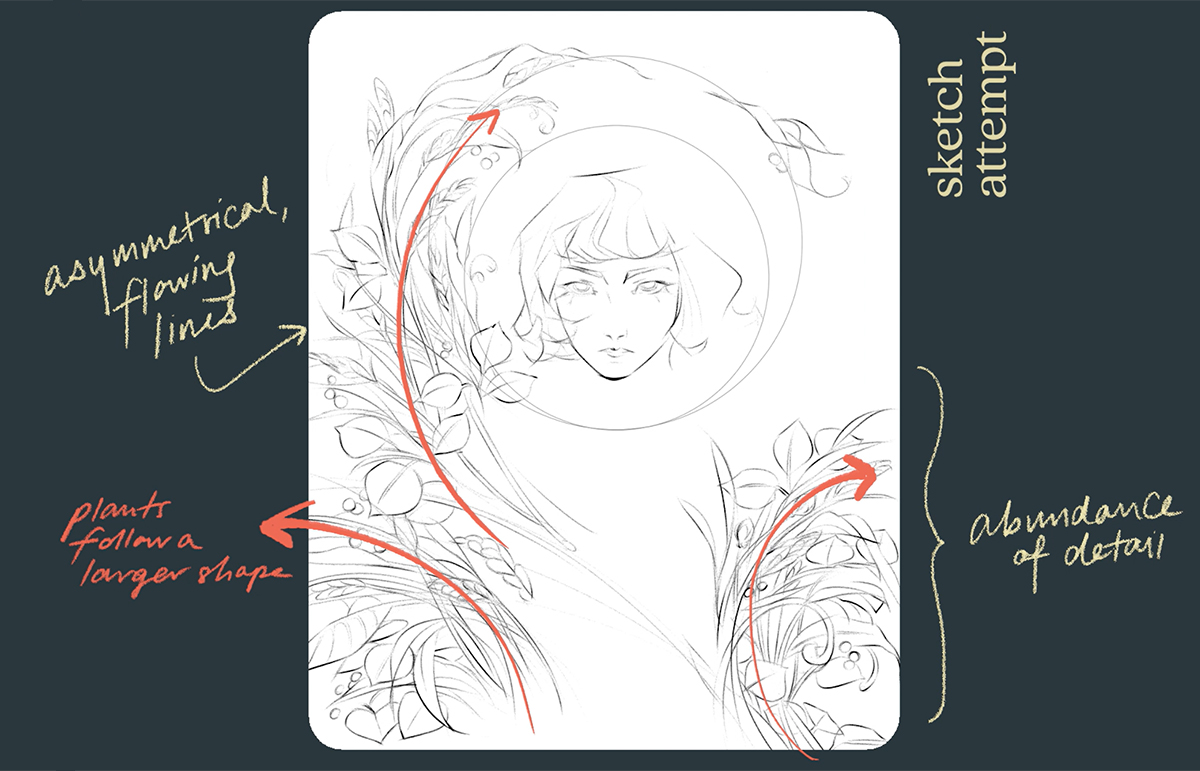
Also note how despite the amount of detail, the plant matter still feels organized.
While they all occupy their own space, they follow a larger shape, reinforcing a sense of flow.
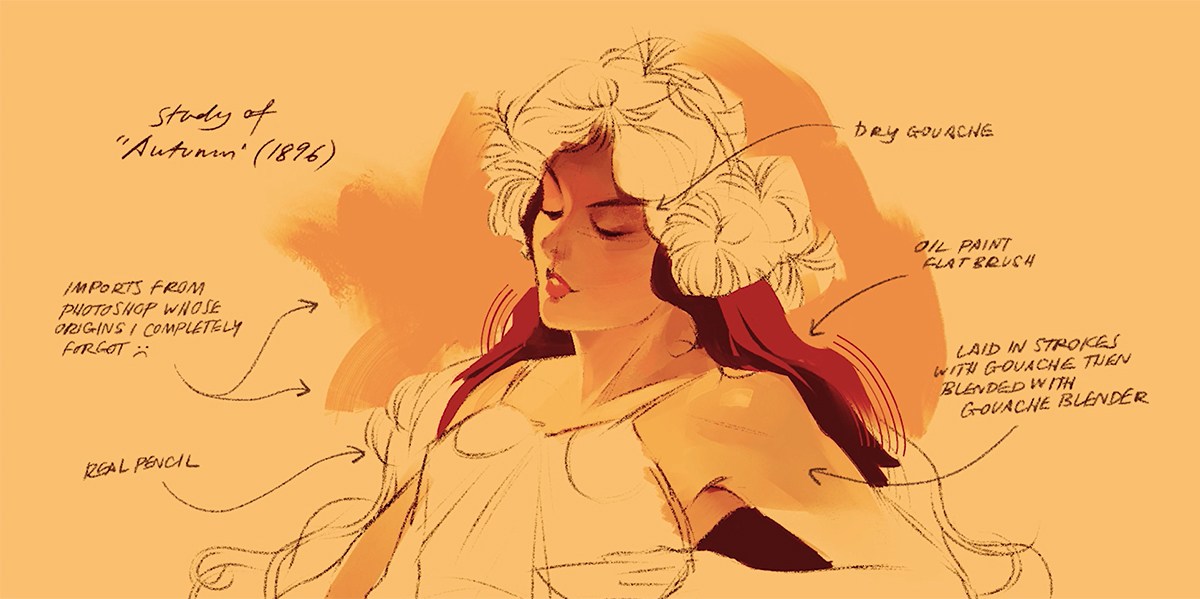
One of my favorite things about Clip Studio Paint is definitely the feel of the brushes.
Almost all of them have a lovely taper at the end and respond nicely to pressure.
Some of my favorite brushes are the “real pencil”, “dry gouache”, “oil paint flat brush”, “gouache”, and “gouache blender”.
↓Study of “Autumn” (1896) Alphonse Mucha
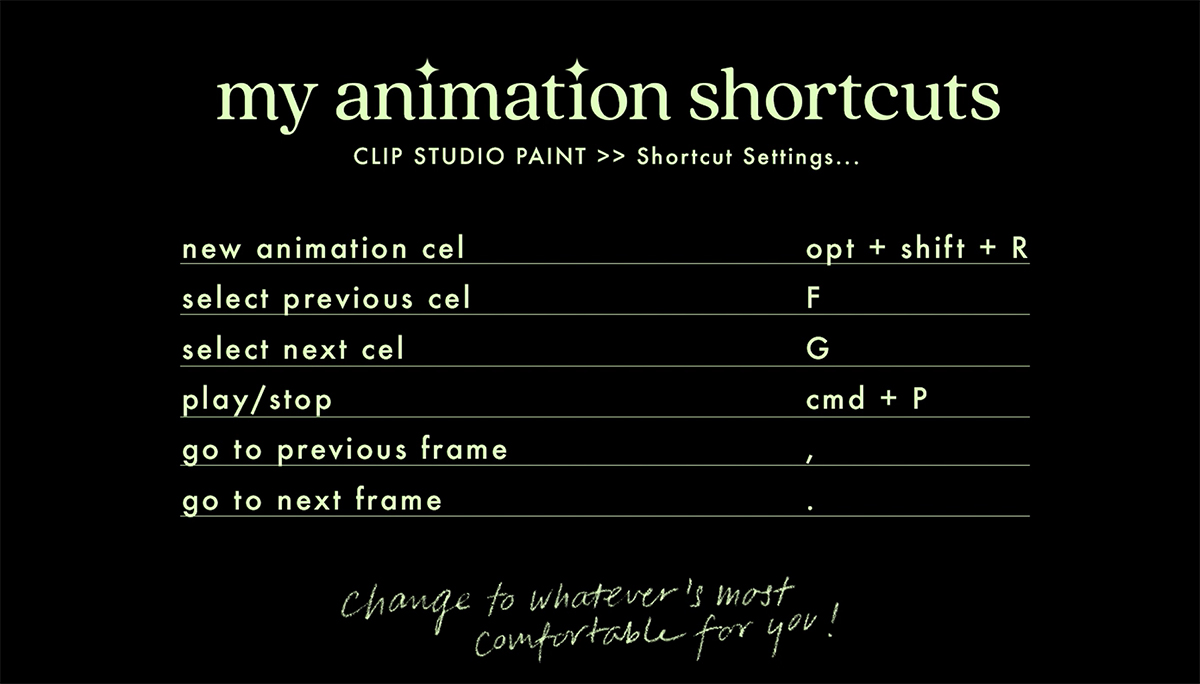
Pre-sets and Shortcuts
Clip Studio Paint works nicely for short & sweet animations, but isn’t completely optimized for the job as dedicated animation software would be.
Just make sure to set up shortcuts for a more seamless workflow:
Workflow
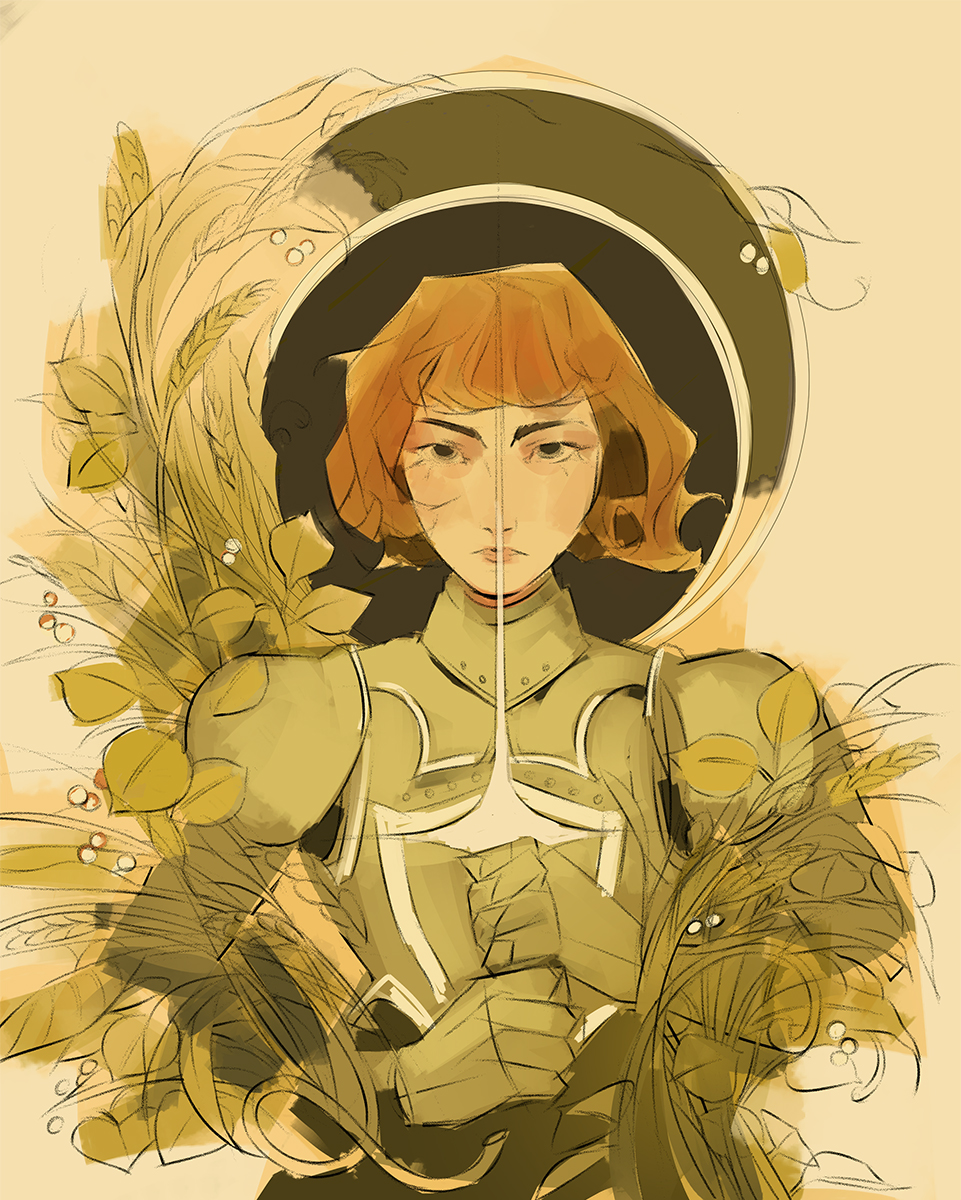
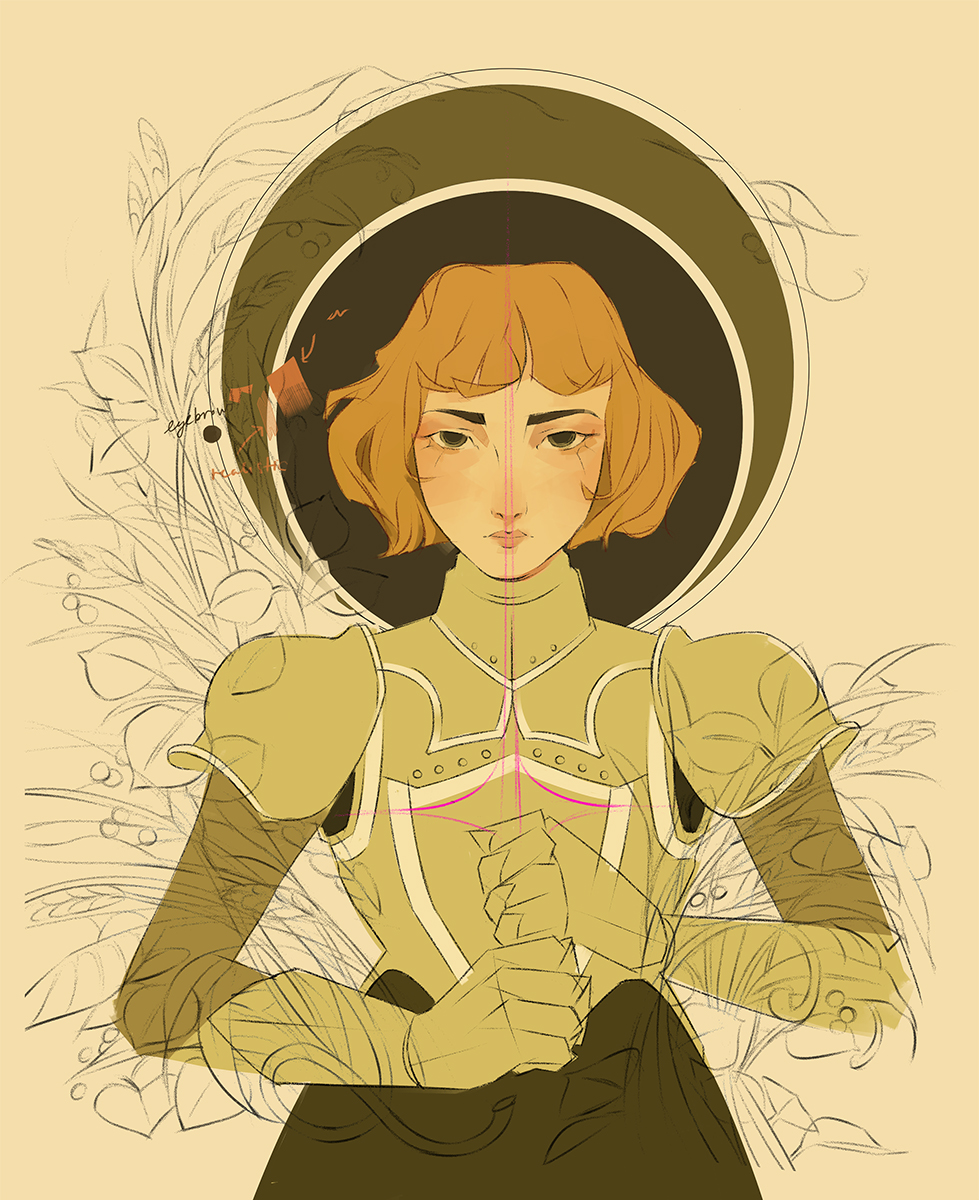
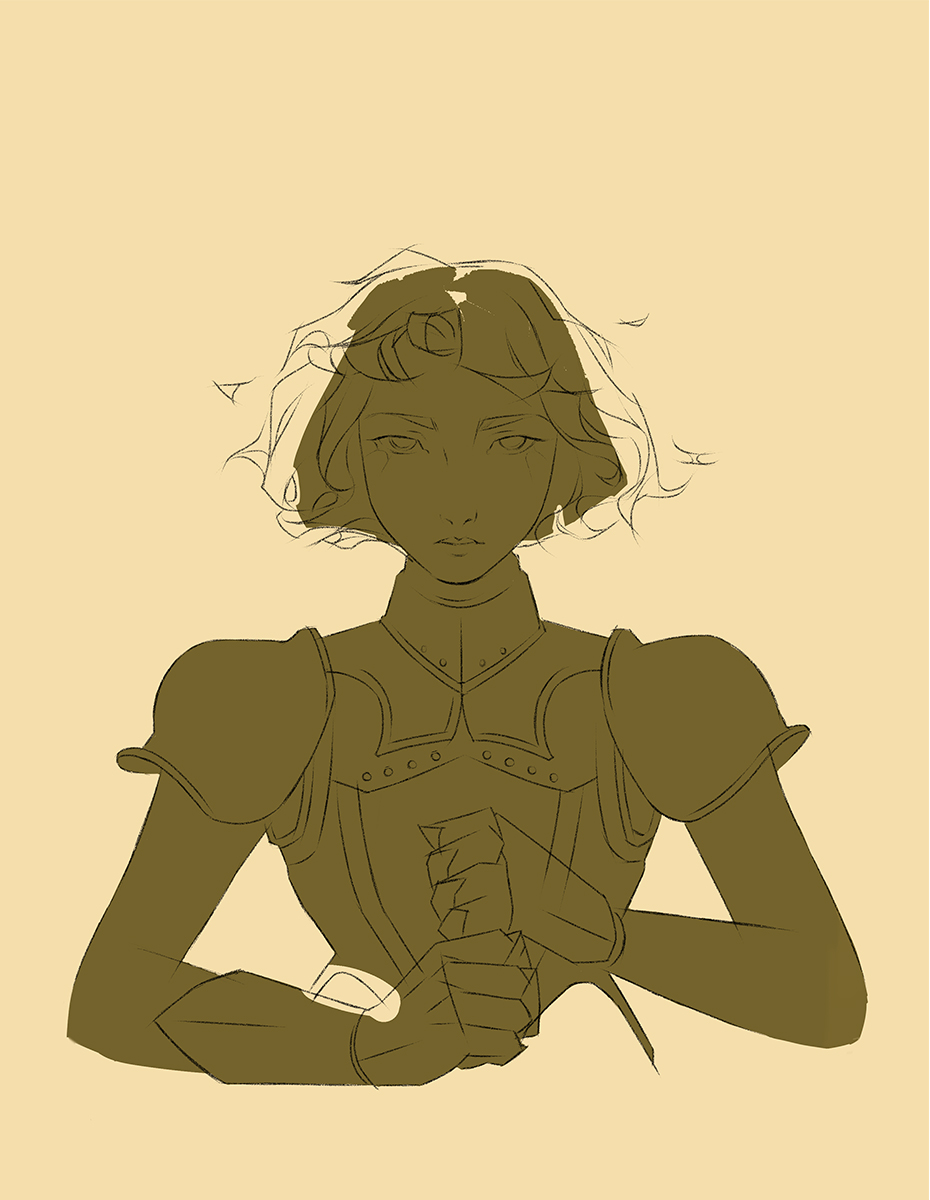
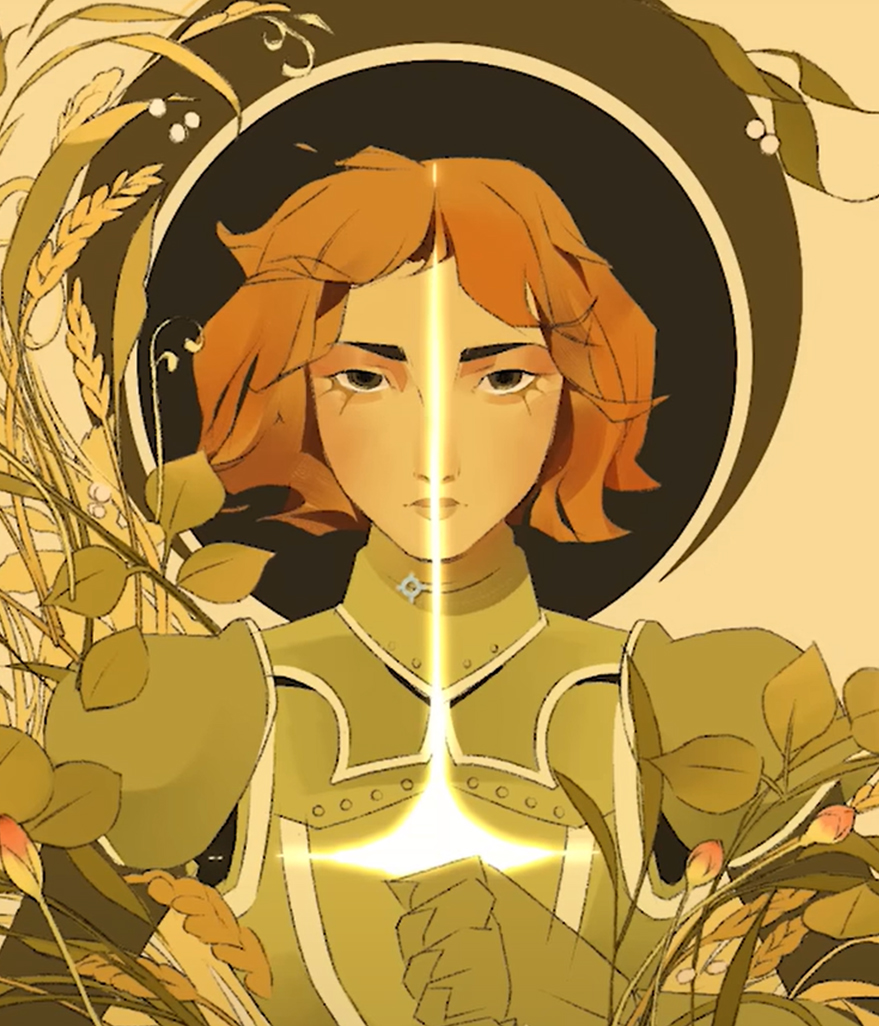
After I finished my sketch, I blocked in some color keys to see what options I had.
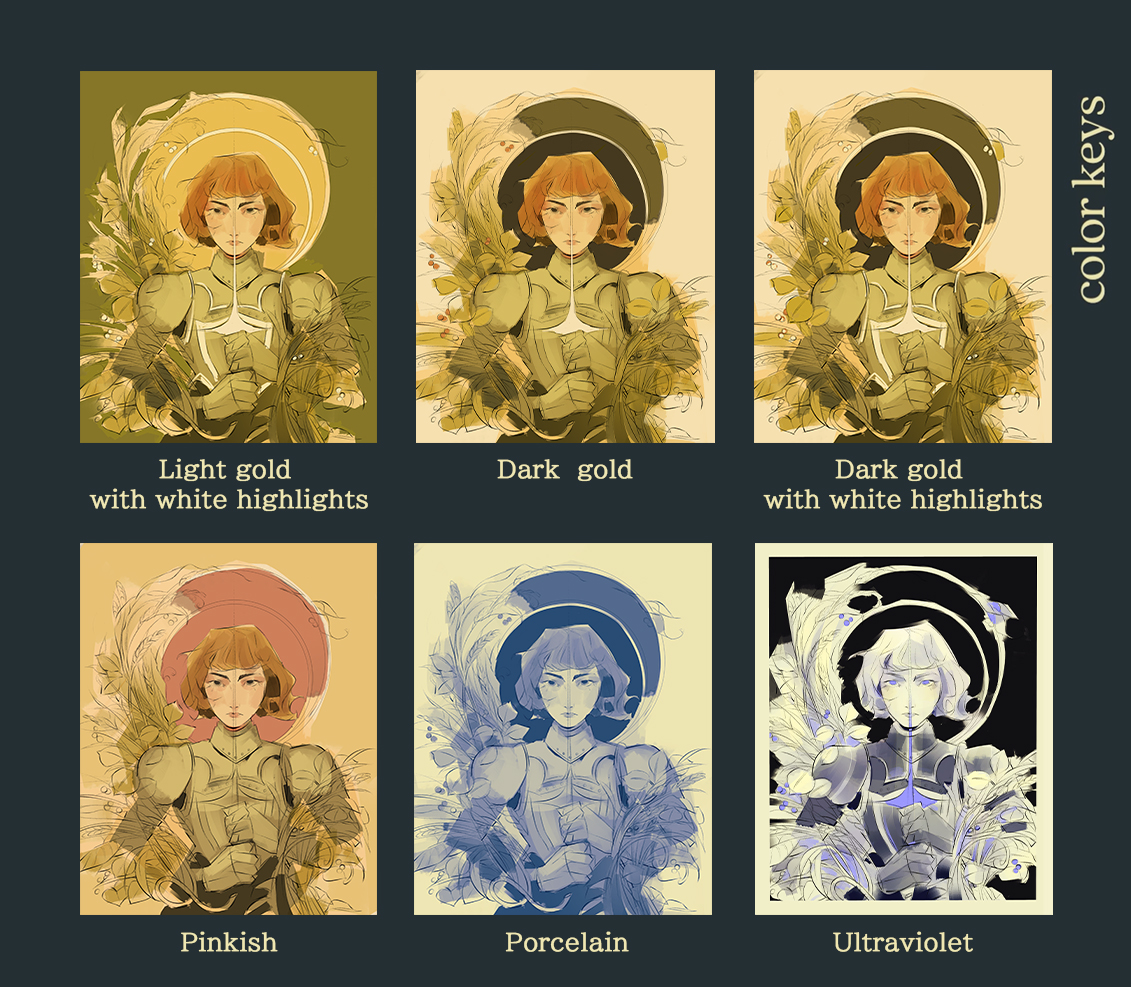
I ended up going with the dark gold with white highlights option, because it felt the most clear and unified. The warmer colors packed into the center immediately draw your eye towards the focal point.
Animation Technique
Let’s start animating!
Usually, my first step is to think about which method I’m going to use to plan my animation: straight ahead or pose-to-pose?
In short, straight ahead refers to animating chronologically, while pose-to-pose means planning your animation using keys and breakdowns before adding inbetweens.
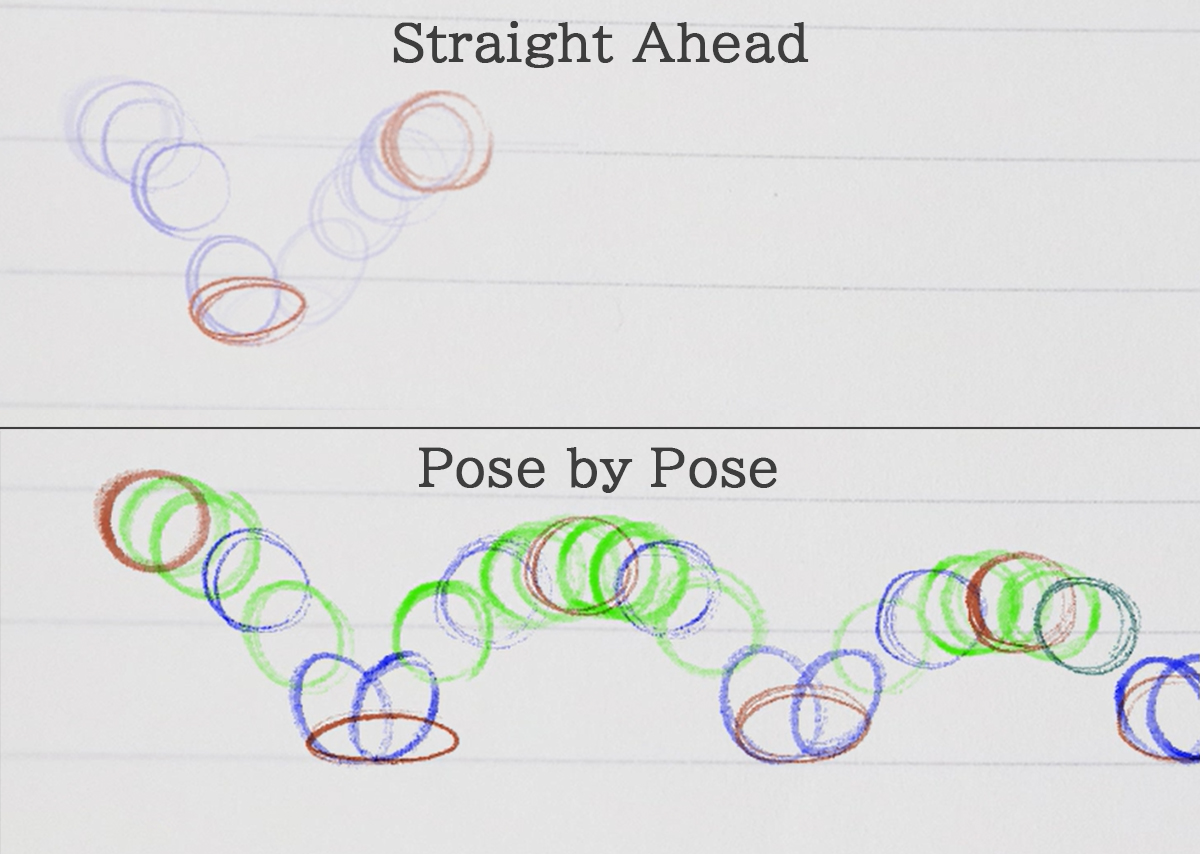
A common misconception is that one method is better than the other.
I want to be clear that this statement lacks context and nuance.
Each method suits a different purpose, and for this project, I’ll be using both.
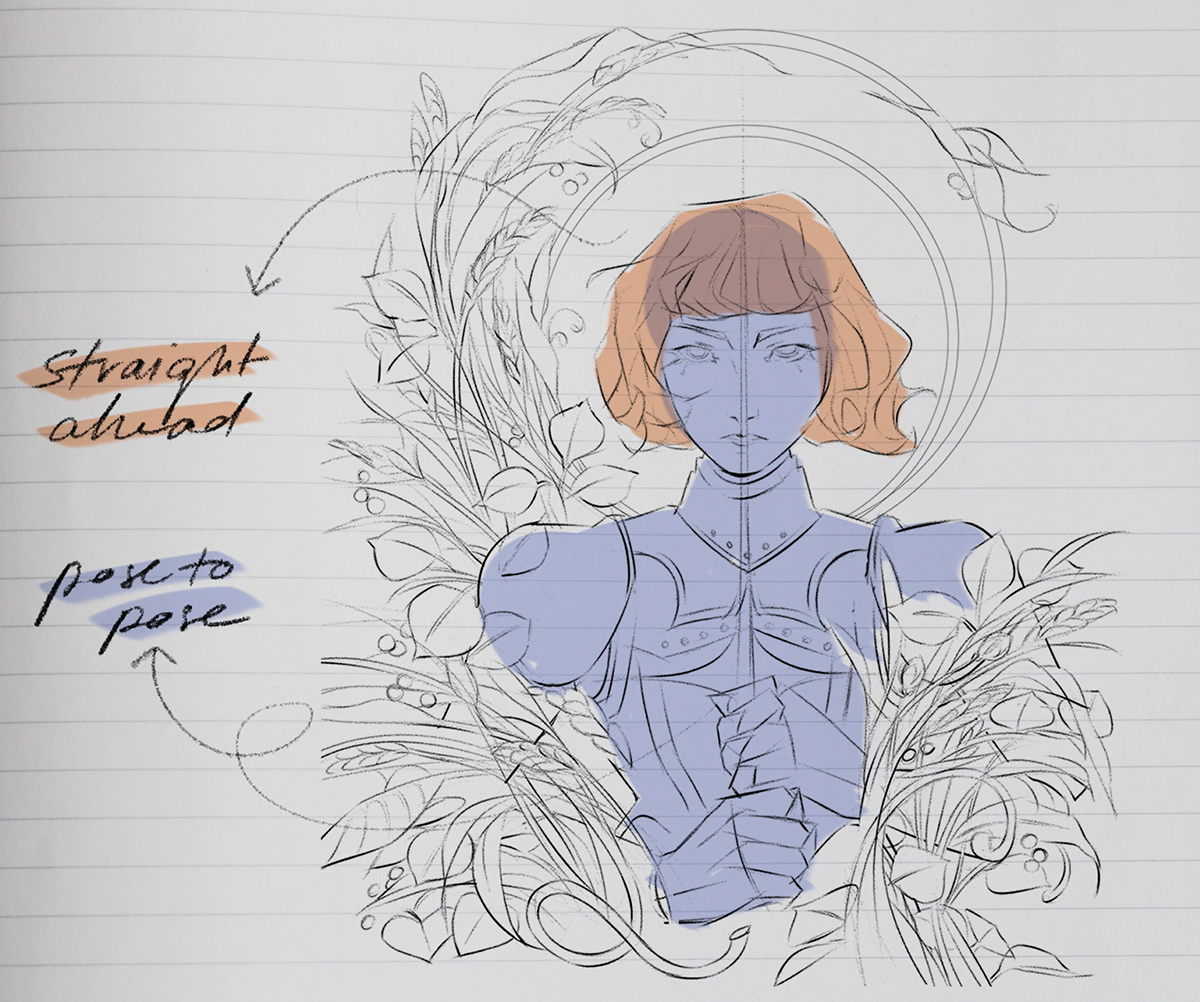
The animation will happen in two parts:
First, I’ll be working on the head, body, and limbs using the pose-to-pose method.
The action is calculated and intentional, and will benefit from a more structured approach.
Afterwards, I’ll animate the hair using the straight ahead method, because its movement is free-flowing and hard to predict.
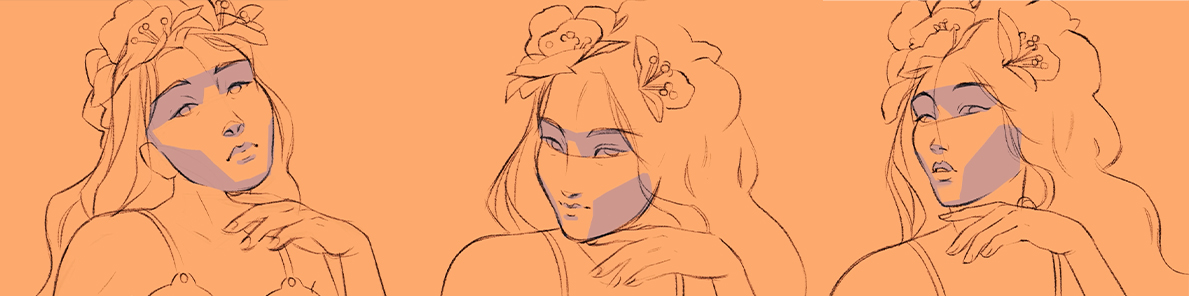
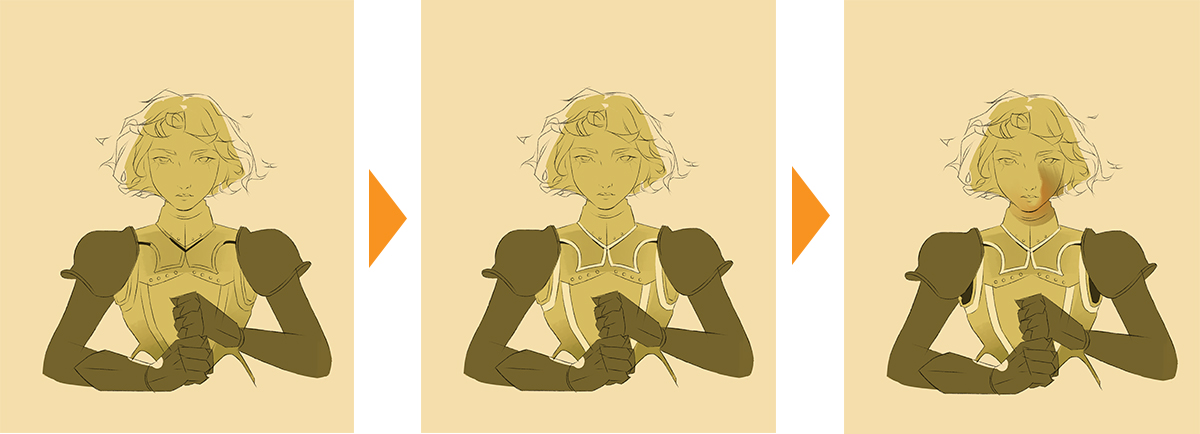
Without further ado, here are my keys, breakdowns, and inbetweens for the head and body.
Keys
Breakdowns
In betweens
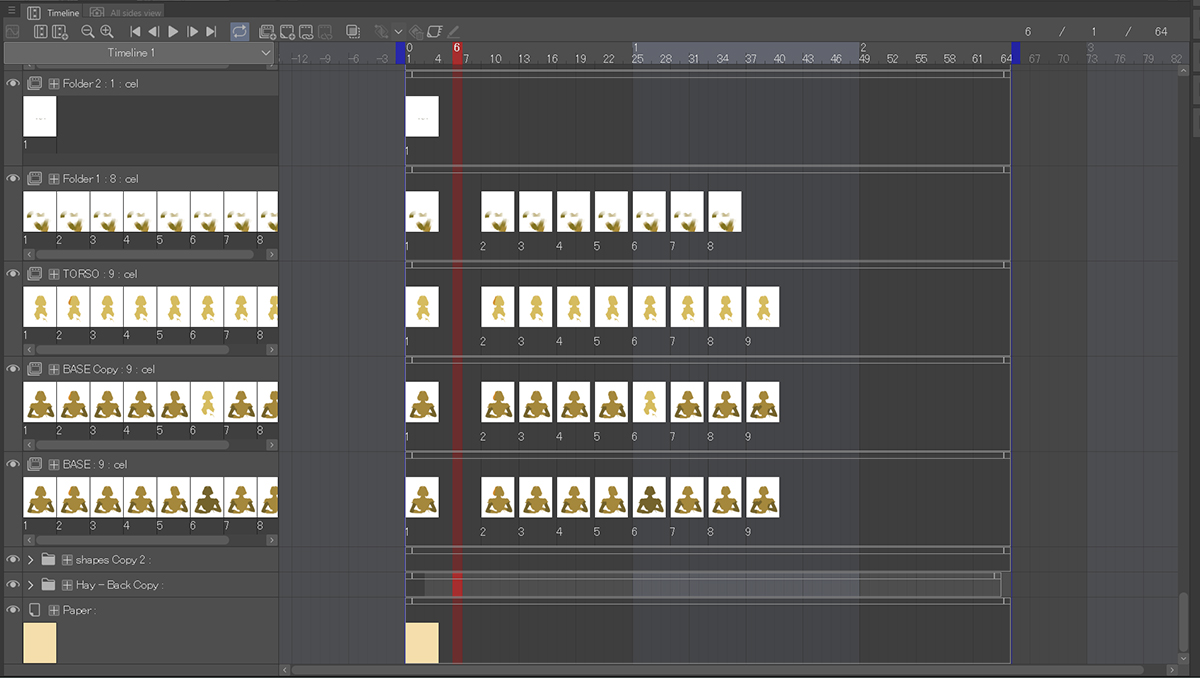
Example of layers arranged on the timeline.
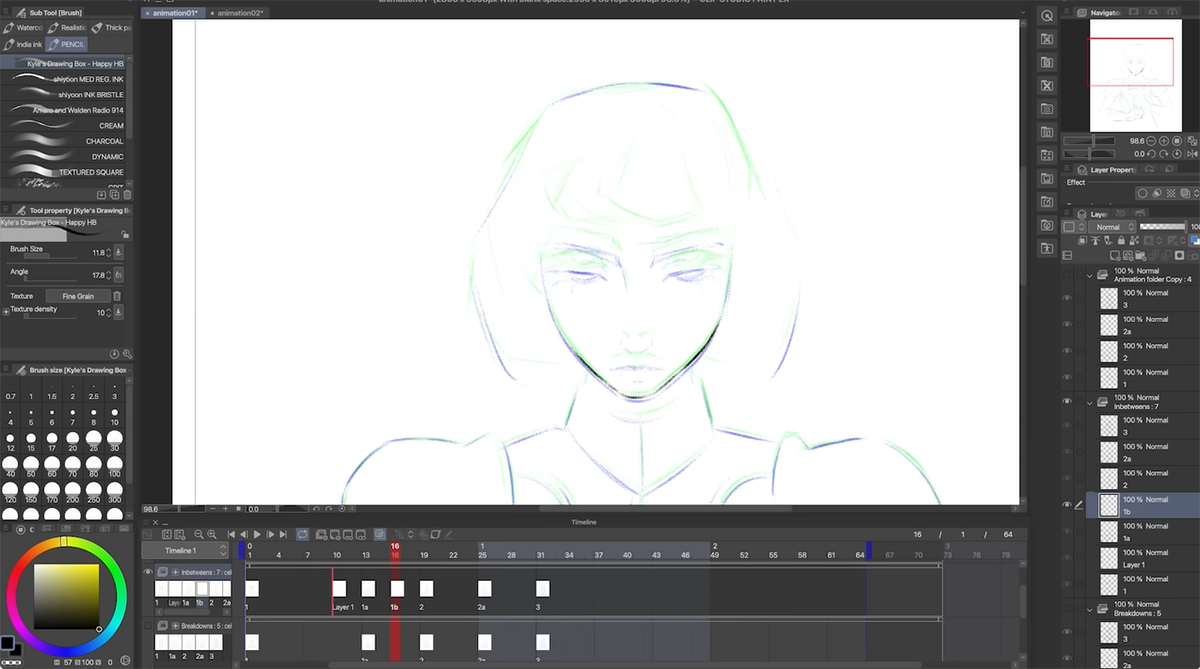
Timeline
Check out these tutorials to learn more about how to utilize Clip Studio Paint for animation using the Timeline function.
Learn about different techniques to create a simple animation.
https://tips.clip-studio.com/en-us/series/268
Learn to navigate the animation layout and functions in Clip Studio Paint.
https://tips.clip-studio.com/en-us/articles/2047
Conveying 3D objects in 2D
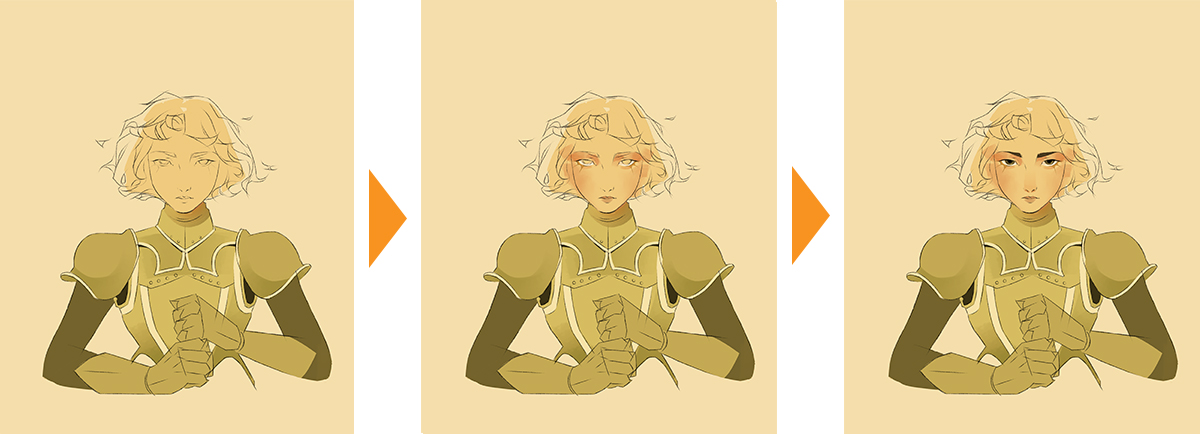
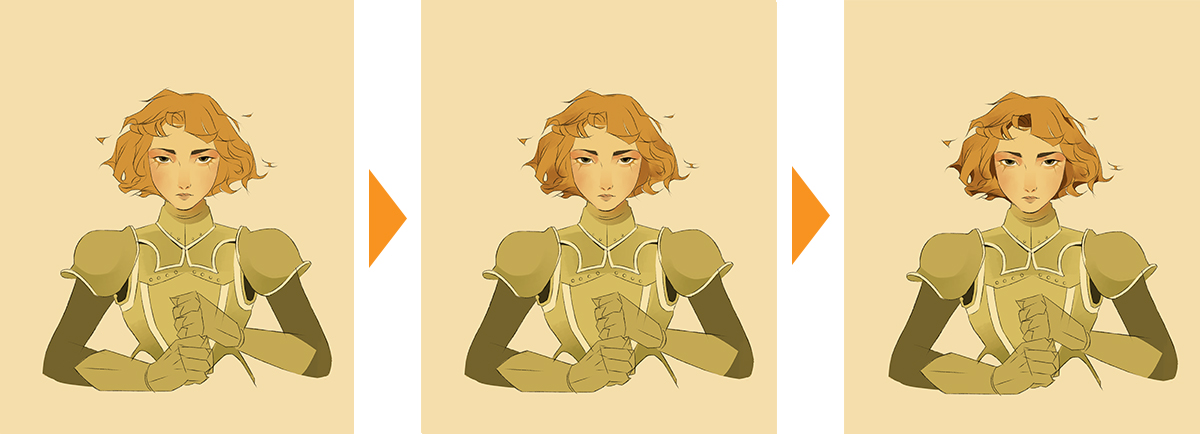
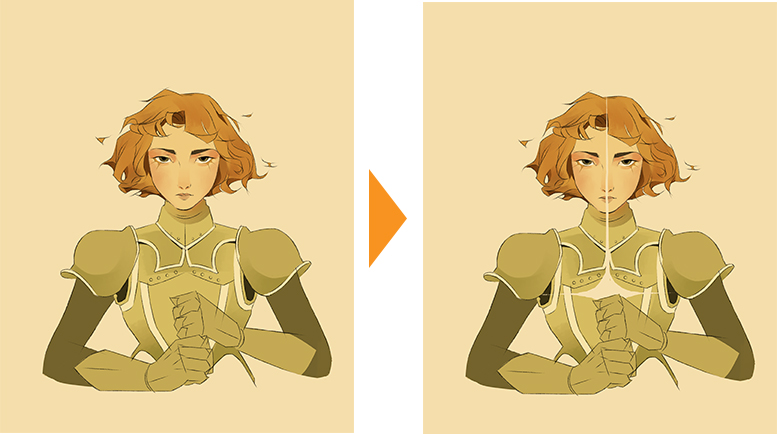
For me, the most challenging stage was the head turn.
How do I convey the turning of a complex three-dimensional form on a two-dimensional surface?
On a sphere-like object, things closer to the center appear to move larger distances than things on the edges, as they travel towards and then away from you.
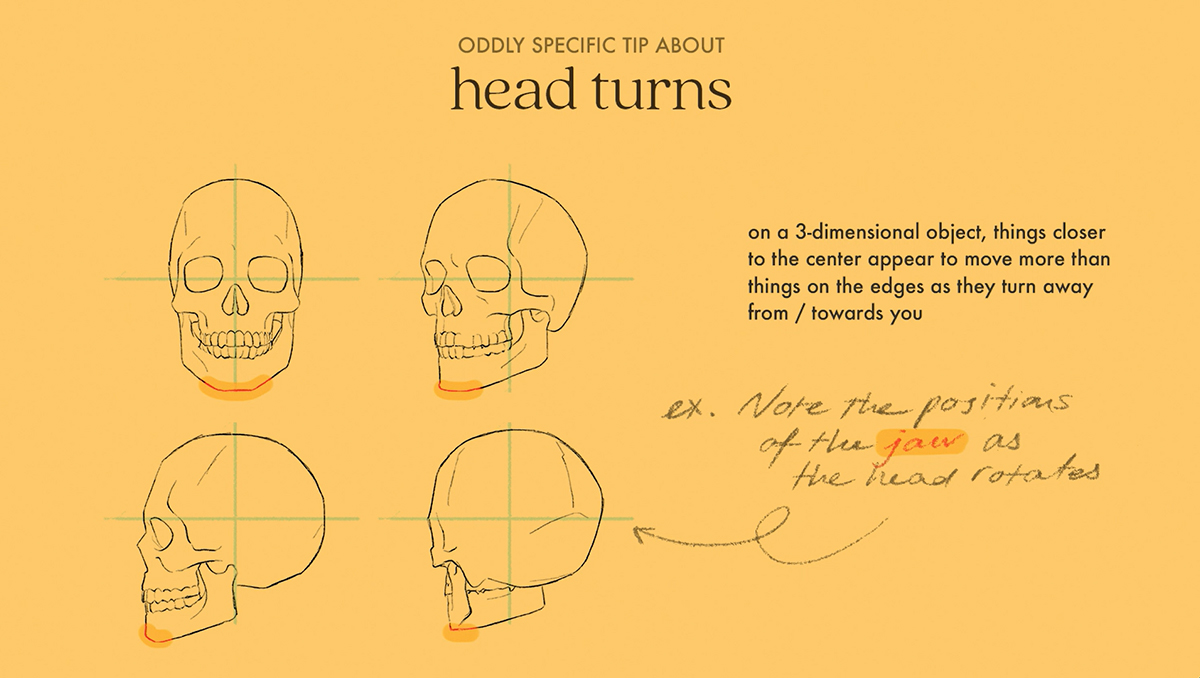
So, on my character, I can expect to see (slightly) more movement with the eyes, rather than the top of her head or chin.
This is rather technical though, so the second and better tip I have is just to look at yourself in the mirror. Notice how the shape of your jaw changes as you look up, or how your eyelids unfold when you look down.
It’s these little things that build up and make a difference, especially when you’re animating slow, subtle action.
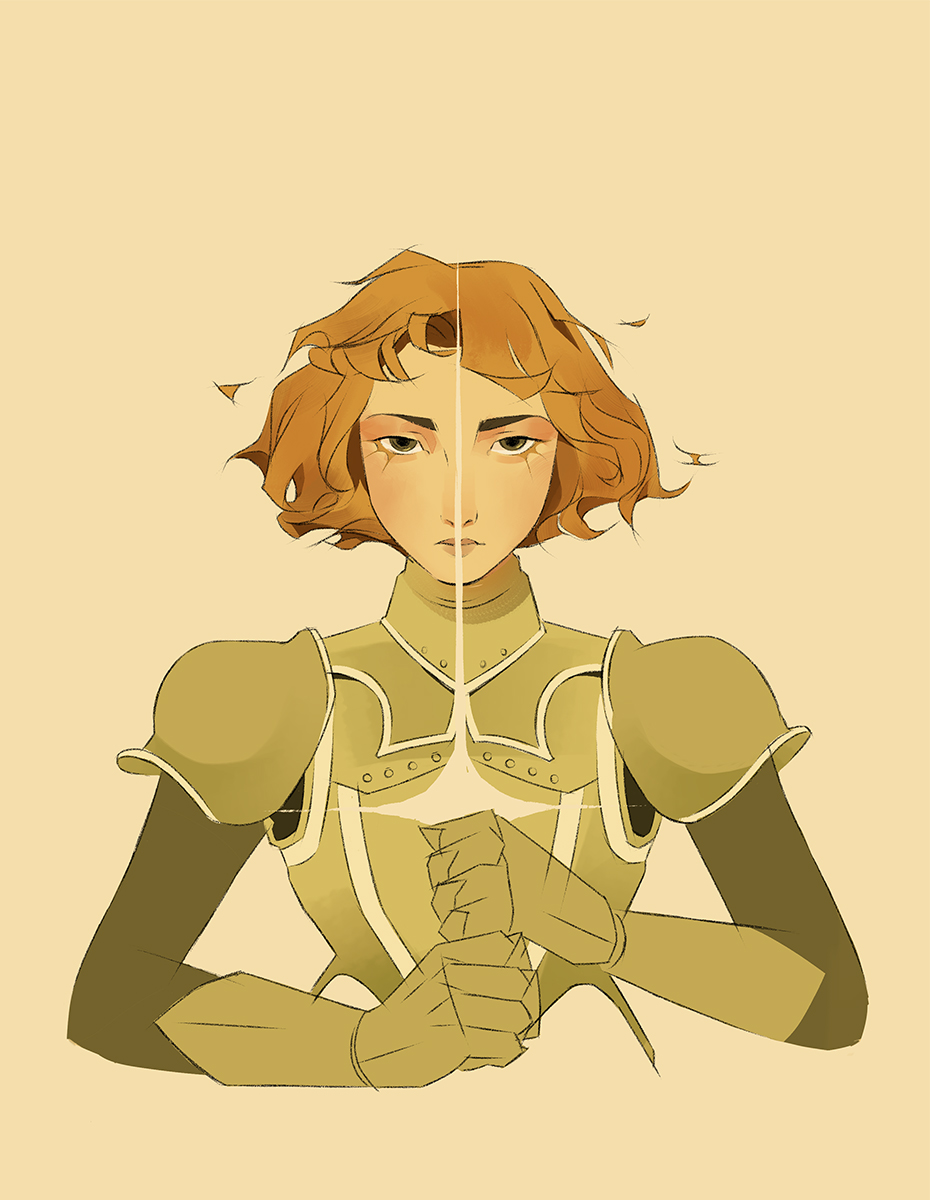
Animating the Hair
Now that I’ve blocked in the head, I’m ready to start roughing out the hair.
It was a bit intimidating tackling such a complex form, but the key to managing complexity is knowing how to break things down.
I first started with a pass that considers the larger shape.
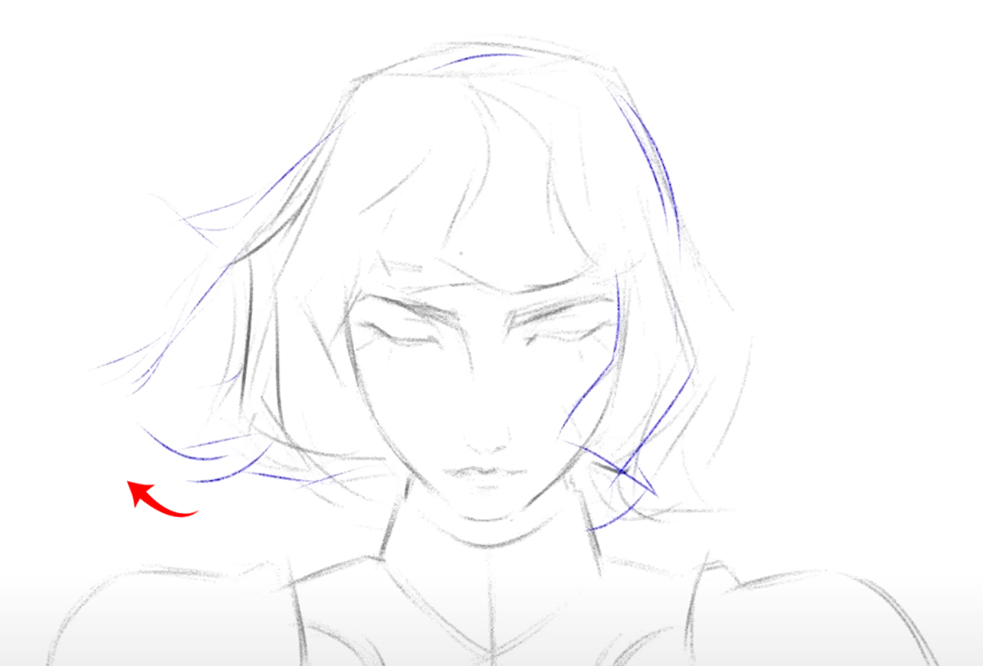
I experimented with the wind blowing her hair from side to side, but I wasn’t convinced it was the best direction for the piece.
My second attempt explored wind that blew from the center out and this ended up working better with my symmetrical composition.
I also wanted the wind to increase in strength as my character looks up to give their small actions more impact.
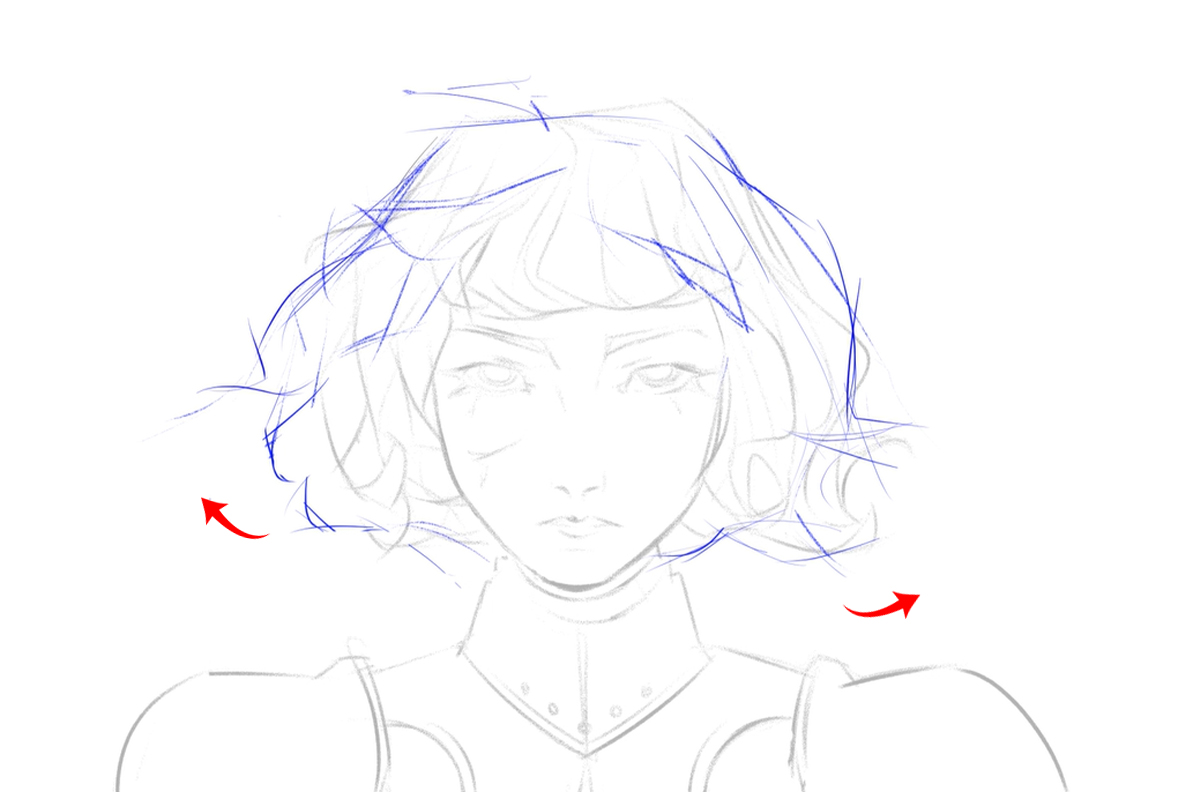
For my second pass, I began to subdivide this larger shape into smaller parts, this time considering how each strand moves individually.
Now that I have a good idea of how I want my animation to look, I’m going to go in and clean up the lines.
Hint
If you’re cleaning up areas that don’t change a whole lot, what you can do to save time and make your drawings feel more consistent is to copy and paste lines and shift them slightly using the transform tool.
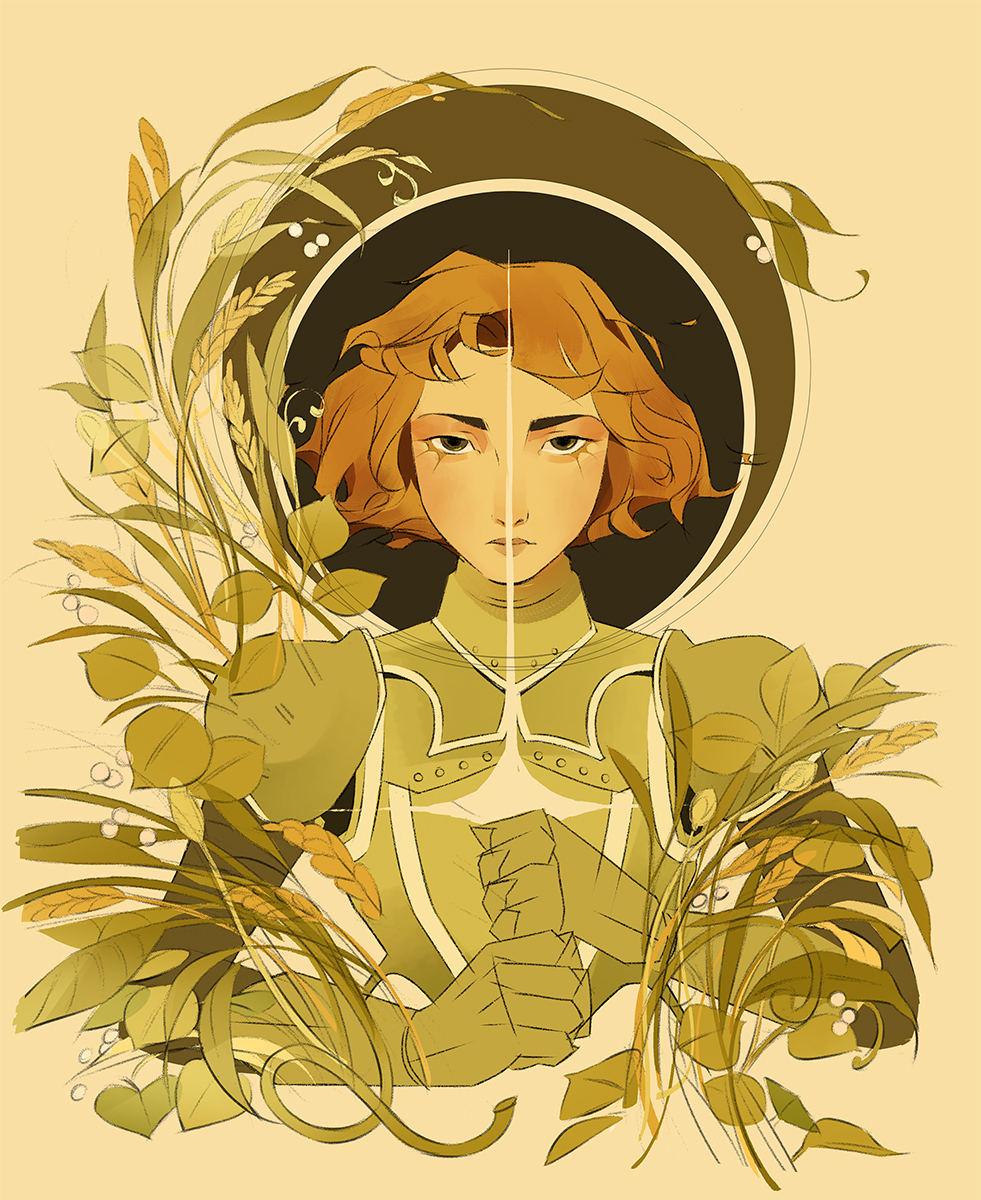
Coloring
Earlier, I created a color key. Now, I’m going to refine it.
Coloring is an incredibly repetitive and time-consuming process, so in an effort to make this easier for myself, I’m being slightly more restrained with how much detail I pack in.
In Mucha’s work, for example, I’m noticing that he’ll most thoroughly render the face and leave everything else flat.
Despite this, his work doesn’t feel incomplete because the face is the most important focal point. On the same note, I don’t have to render every single thing in order to make my piece feel complete.
This is also the stage where I finished up my background.
I’m keeping the stalks on separate layers in order to animate them later.
Onto the actual coloring part:
Typically, I’ll make a new layer for every new color introduced, the reason being that it’s much easier to make edits afterwards if everything is separated.
And yes, this means a lot of layers.
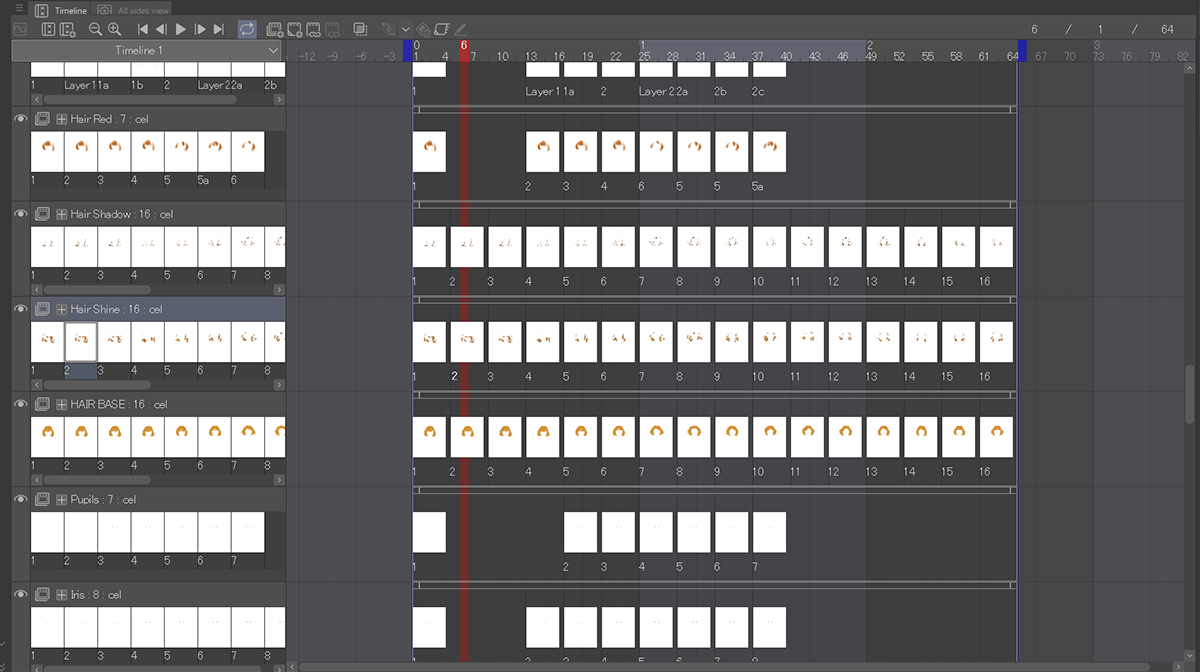
At the very bottom, I have a base layer.
Every layer above is just a duplicate of the base layer with the arms cropped off.
This way, I don’t have to retrace and then refill the areas I’ve already drawn.
After that, I added some cast shadows, a layer for the hand, and one for the shoulder armor.
One for the head and multiple layers for each of the painted details on her face.
Same goes for her hair…
Finally, one layer for its form shadows, another for its cast shadows, and one more for the sword.
Combined, it looks something like this:
Hint
The way I was able to keep my brushstrokes in detailed areas (like this face) consistent was just to make one stroke, then copy and pasting it onto all my other frames.
This saved me some time as well!
Composition in Adobe After Effects
Okay so we’re almost there.
As a final step to enhance my piece, I want to make the plants move.
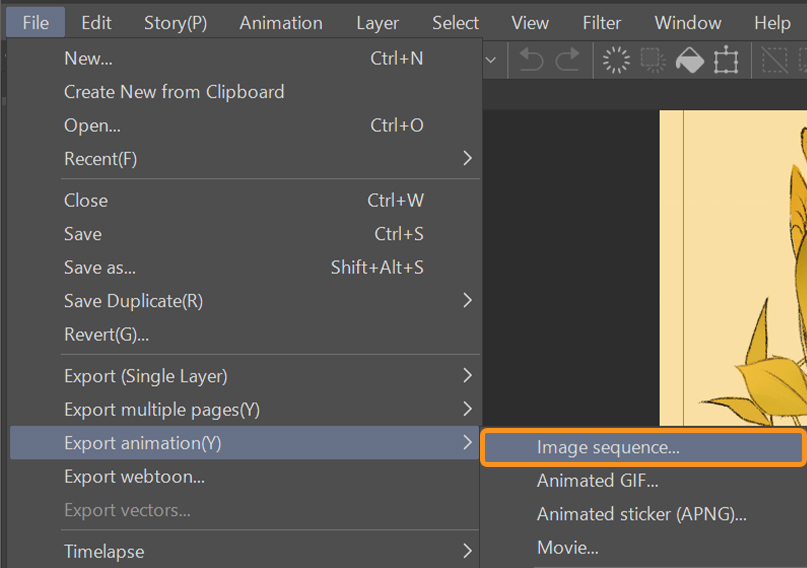
We’re going to export our layers and composite them in After Effects.
To do this, select File > Export animation > Image sequence.
In the Image sequence export settings popup, select PNG as the export format (this keeps the background transparent).
Click OK.
Import the image sequence into Adobe After Effects.
To move the plants surrounding my character, I used an effect called Wave Warp (find this in the Effects & Presets category).
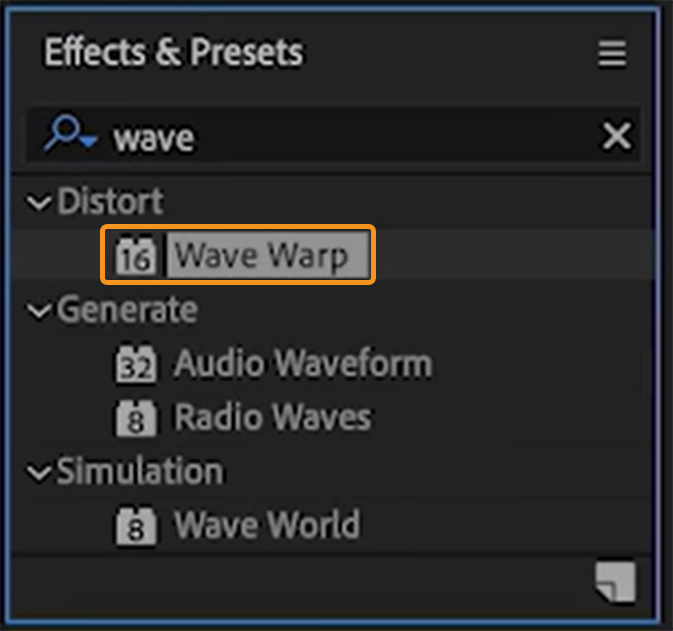
You’ll need to mess around with the values on the left interface to design the movement you want.
I adjusted height & width, direction, and wave speed.
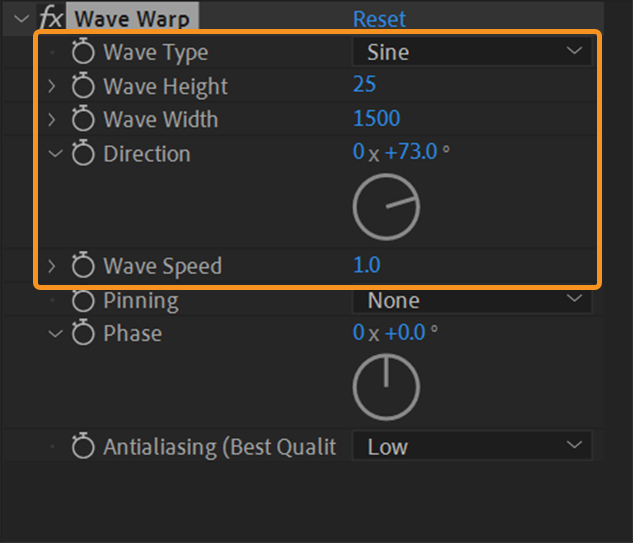
You might end up with something like this.
Next, let’s make the sword glow.
All you have to do is make a duplicate of the sword layer.

Then throw in some Gaussian Blur (also found in the Effects & Presets category).
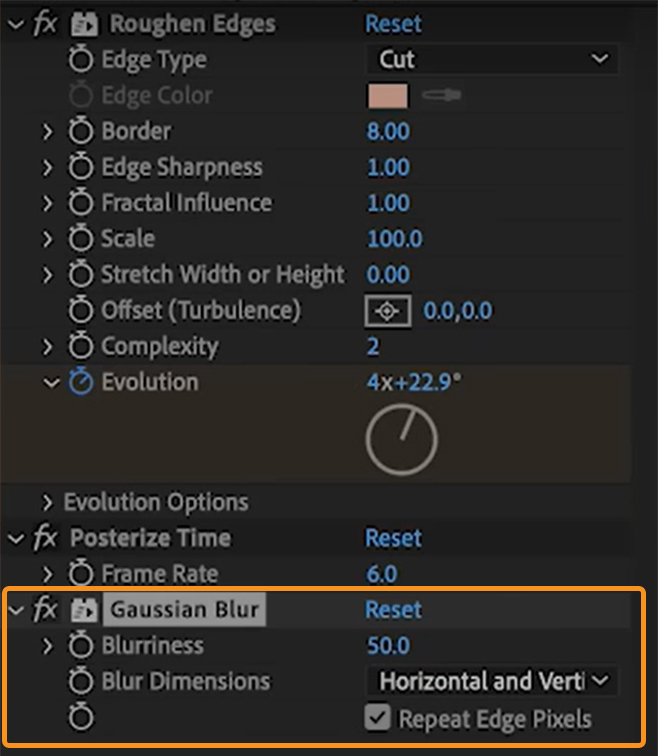
Lastly, play around with blending modes as you see fit.
This time, I used Add to create the glow.
You can select the blending mode by right-clicking the image file you want to edit.

Final Animation
Here’s the final result:
Thank you as always for sticking with me until the end.
I realize that this might be intimidating for those of you who are just starting out — I’d like to say that this is very much the result of years of built up knowledge and experimenting outside of my comfort zone.
If you’re a beginner, I strongly encourage you to expose yourself to different kinds of art from different times and places, and study those you admire.
I’ve found that it’s those things that have helped me shape my voice the most.
Happy animating!