Introduction
Creating a comic or manga, and bringing your characters and stories to life is a rewarding and exciting journey. However, finding the right starting point amidst your many ideas, might be a daunting prospect.
In this article, we explain the basic process of planning and creating a comic, along with some digital tools and tips that can help you work toward your desired outcome.
Preparing to create your comic
The first thing that you need to do to start your comic is to organize your ideas. Before starting to draw, write down your characters' profile and background and think about the plot they are involved in in the comic. Decide how the characters will develop through the plot events and their actions in the story, and how the story will unfold. Even if you are aiming to write in a serial format where the final plot isn’t fixed yet, you should have an idea of your first major plot points, as well as the character motivations and worldbuilding, and at best, the ending of your story.
You may find it helpful to write the story out in script form before starting your thumbnail pages, in order to lay out the dialog and actions like stage directions.
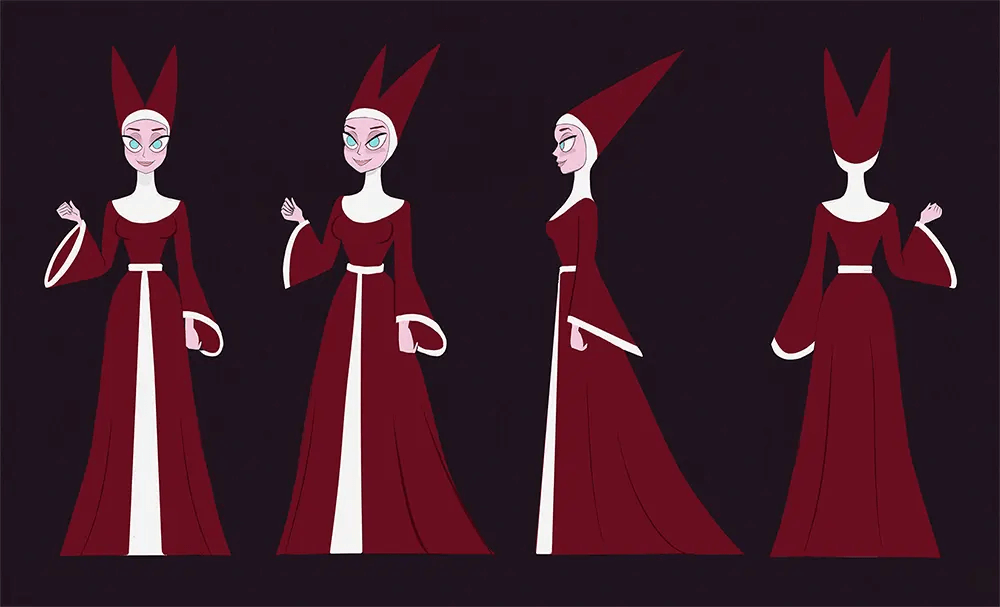
Character design sheets or model sheets are an important resource for comics and manga to ensure consistency when telling your story and portraying your character. You will be drawing the same characters many times, so creating a character sheet with typical expressions, examples for body language, and recurring outfits and hairstyles from several angles, will make it easier to not forget details. For example, if your character has a complex tattoo, emblem, or insignia that will appear often, it helps to draw a clear reference in a separate document, so you don’t have to comb through your files to check.
You can also save design elements of your characters as a reusable material in apps like Clip Studio Paint to ensure consistency, and import and place items quickly.
See here for more information on character design.
Panel Layout and Composition
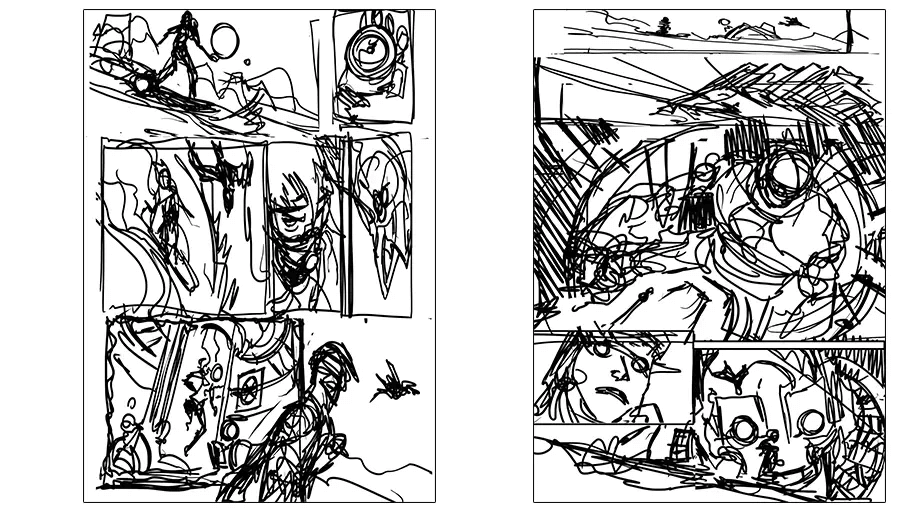
Once you’ve decided on your story and characters, it’s time to lay out thumbnail mockups of the panel layout for your comic pages. As well as the story you want to tell, consider how the reader’s eye will travel around the page, and how you will provide new information to the reader.
Thumbnails should be small and drawn roughly to make it easier for you to see how the panels work together and which aspects stand out and draw focus. This will also help you to not get too invested with details, but rather focus on the bigger picture and overall storytelling.
Think about the placement of speech bubbles at this stage, to ensure that they won’t overlap with important elements of your characters and backgrounds by mistake.
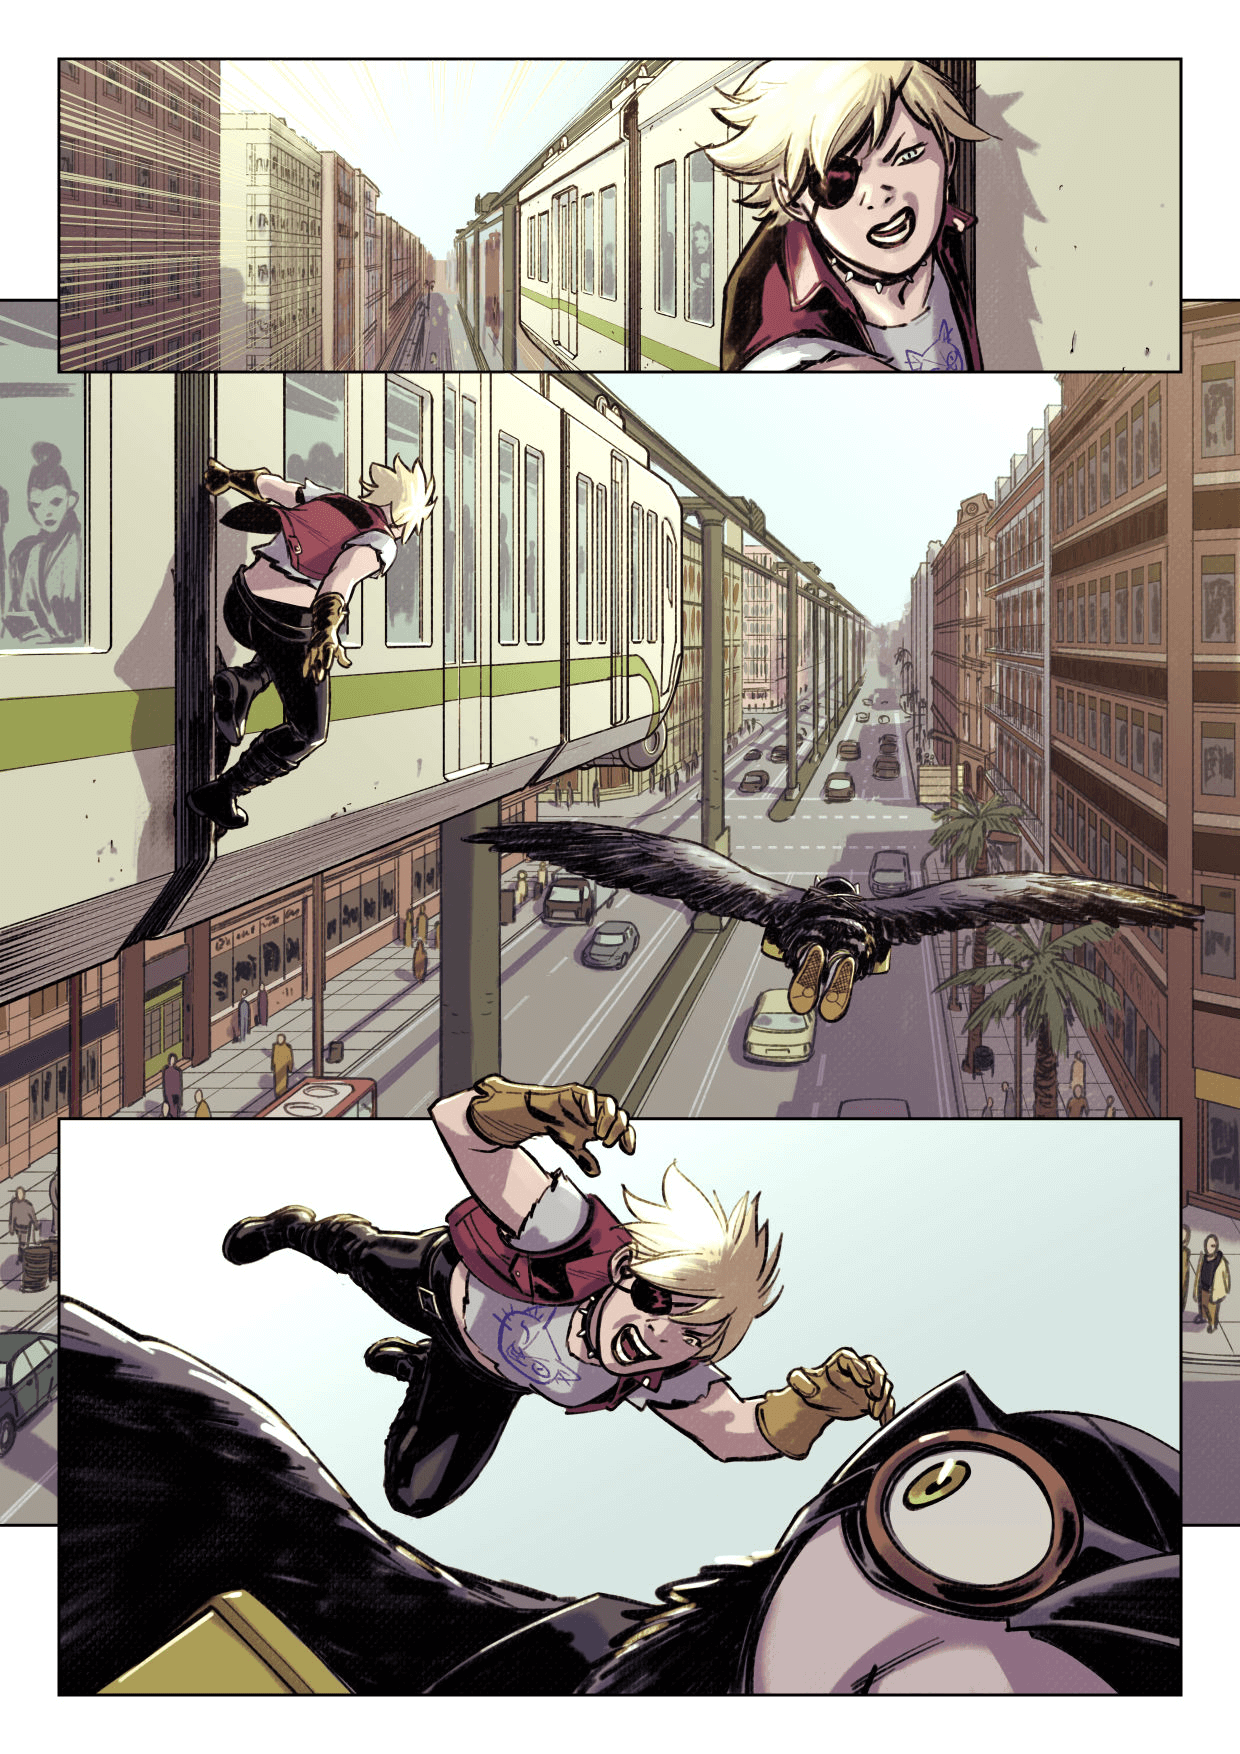
When a scene or location changes, include an establishing shot that shows the wider place, time and circumstances to help the reader contextualize the setting. Once the setting is clear, character-focused panels don’t need too much detail in the background. While a few large panels can create a certain calm to the flow of the story, consider using lots of small panels for action scenes to create a faster pace and build tension. You can culminate these in a large focus panel that shows explosive action.
If there are scenes with a lot of dialog, try varying the panel compositions so that the flow of the story remains engaging. Rather than static bust-up shots of the speaking characters, a panel could show the character’s silhouette, an object relevant to the dialog, close-up of an expression, or an action happening during the dialog.
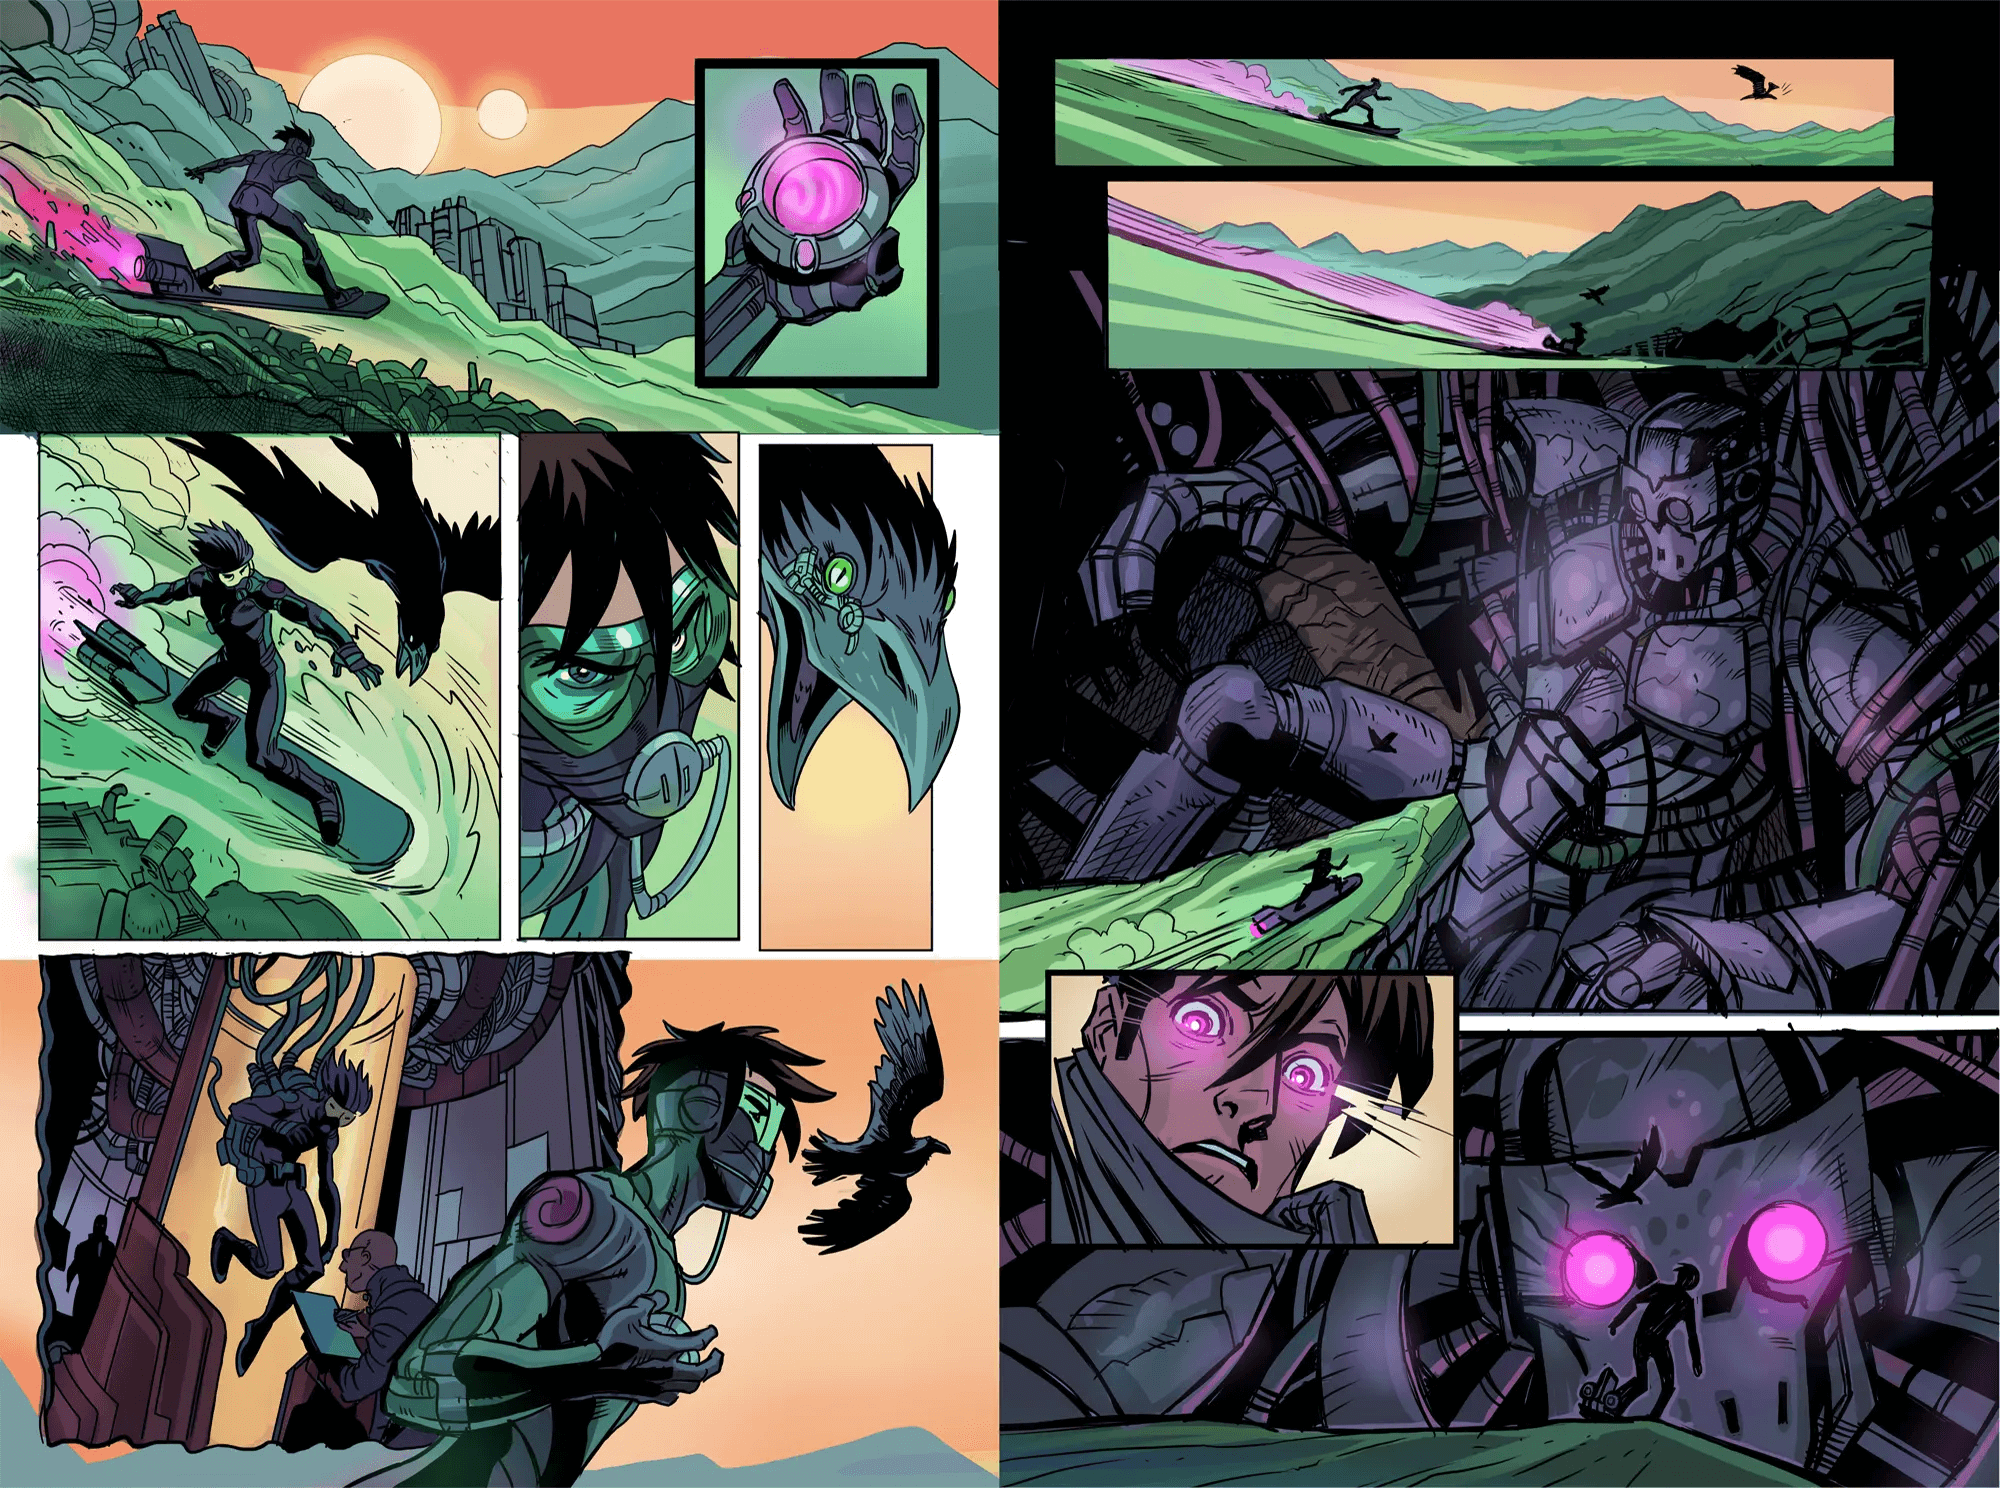
Overall, for graphic novels and comics, try drawing a mix of close, medium, and wide shots in different panel sizes to add variety while considering how the panel size and composition compliment the events of the story.
Size Settings for Manga and Comics
When creating manga and comics, choosing the right size settings is essential for both print and web formats:
- Print Size Settings
Opt for 300 DPI or higher to ensure high-quality prints for color comics, and 600 DPI for black and white manga. Match the canvas size to your intended physical print dimensions, such as trade paperback size (6.625 inches x 10.25 inches) or A4 (210 mm x 297 mm). For color accuracy in print, use a CMYK preview or CMYK mode.
- Web Size Settings
72 DPI is suitable for web display where screen resolution is lower. However, if you want to leave open the possibility of printing your comic in the future, you can create it at a higher print resolution and export at 72 dpi later. Many comic uploading sites allow for flexibility on canvas dimensions, but an aspect ratio of 2:3 is suitable for page formats. Use RGB mode for vibrant colors on digital displays.
Drawing the Pages
Once you’re satisfied with the thumbnail layouts, it’s time to move on to creating your comic at the size you intend it to be. Make sure to check image size requirements for print or the site you want to upload to, and create your canvas at the appropriate size and resolution. If you want, you can import your thumbnail sketches to the new project and keep them as a base layer at a low opacity to reference them when sketching and creating the comic panels.
Sequential art doesn’t have many rules for style, and you can find all sorts of artistic genres for comics, from the typical American superhero comic book style to a soft painterly novel illustration style or lineless cartoon styles. However, make sure to follow the general rules for the layout of the format you’re creating, whether it’s comics or manga, so that it can be printed or displayed as clearly as possible.
The way you create your panels depends on the software you use and the tools that are available to you. Apps like Clip Studio Paint have a dedicated paneling tool that automatically creates panels as a layer folder and masks the rest of the canvas, so you don’t need to worry about your drawing overspilling. Some artists prefer to hand draw panel borders with ruler tools on one single layer. Likewise, speech bubbles can be drawn by hand or created from presets and special tools.
Once your panels and dialog are arranged on the page, you can follow your normal process for sketching and drawing in your usual style to create the finished artwork for each panel. Unlike full illustrations, individual comic panels don’t need too much detail as most readers won’t linger more than a few seconds on each frame. Draw just enough to convey the story, and leave details for large focus panels, closeups and comic spreads where you want your readers to pay attention.
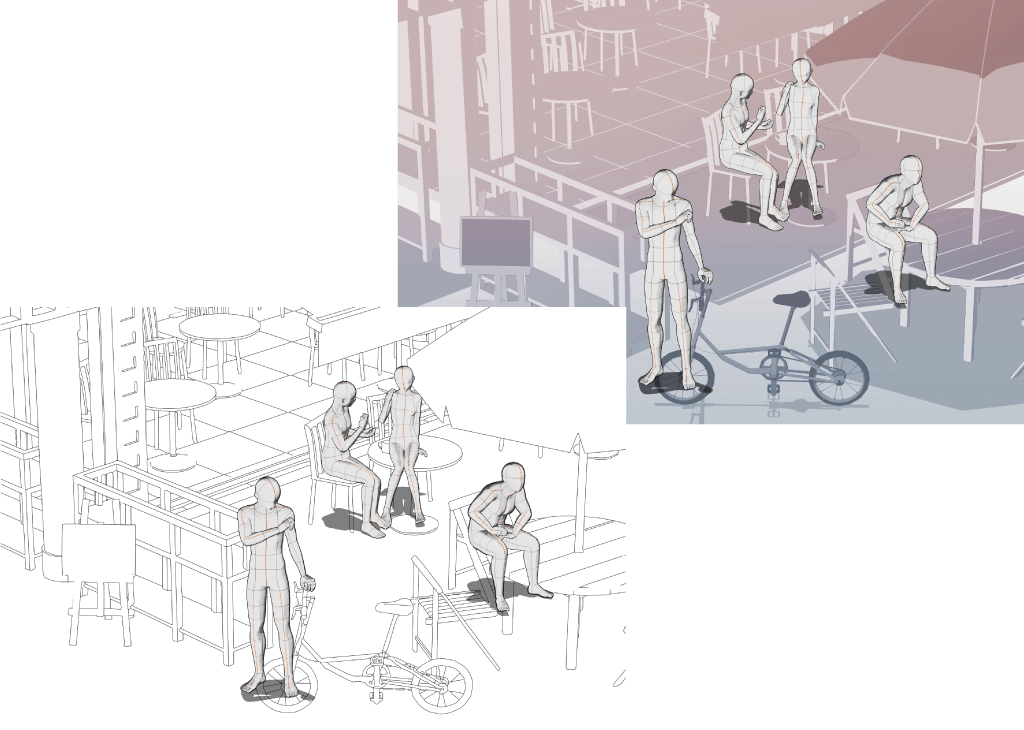
When sketching your comic pages, you may find it useful to use 3D materials as a reference. These can assist you with difficult angles or help you imagine places for which finding references is difficult. You can find complex 3D models of backgrounds such as rooms, city streets and other environments online on asset marketplaces such as Clip Studio Assets, Sketchfab, or CGTrader.
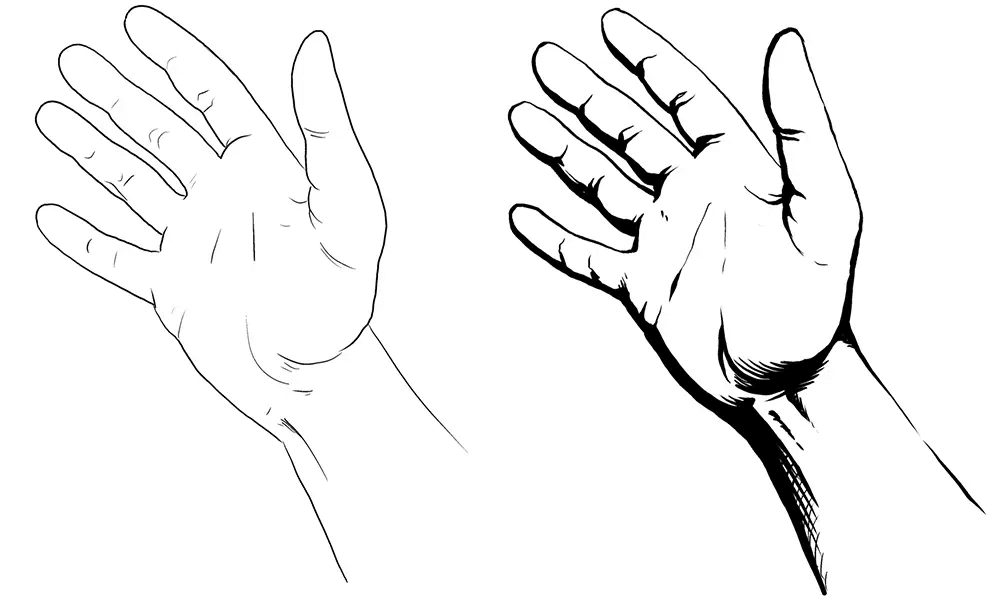
Moving on to inking your pages, if you are aiming for a more traditional comic style, paying attention to your line weight is important. Thicker lines usually represent shadows, whereas thinner lines are used for the lighter side or to de-emphasize objects in the distance. For details on inking techniques, see this article.
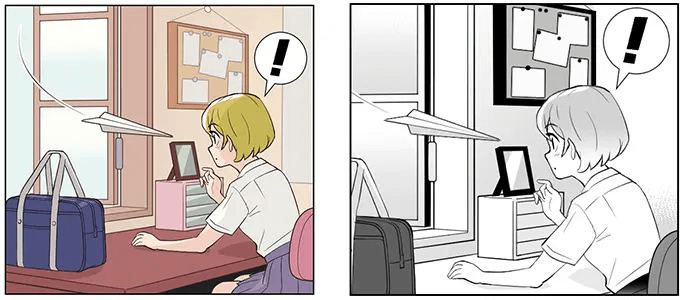
In black-and-white manga, light and shadow are expressed using screen tones instead of color. Screen tones work with different sizes and densities of dots and lines to create varying values. In Clip Studio Paint, the application of screen tones and gradients can be done simply via drag-and-drop of a selected screen tone onto the canvas. This even works for specifically selected areas.
Lettering and Sound Effects
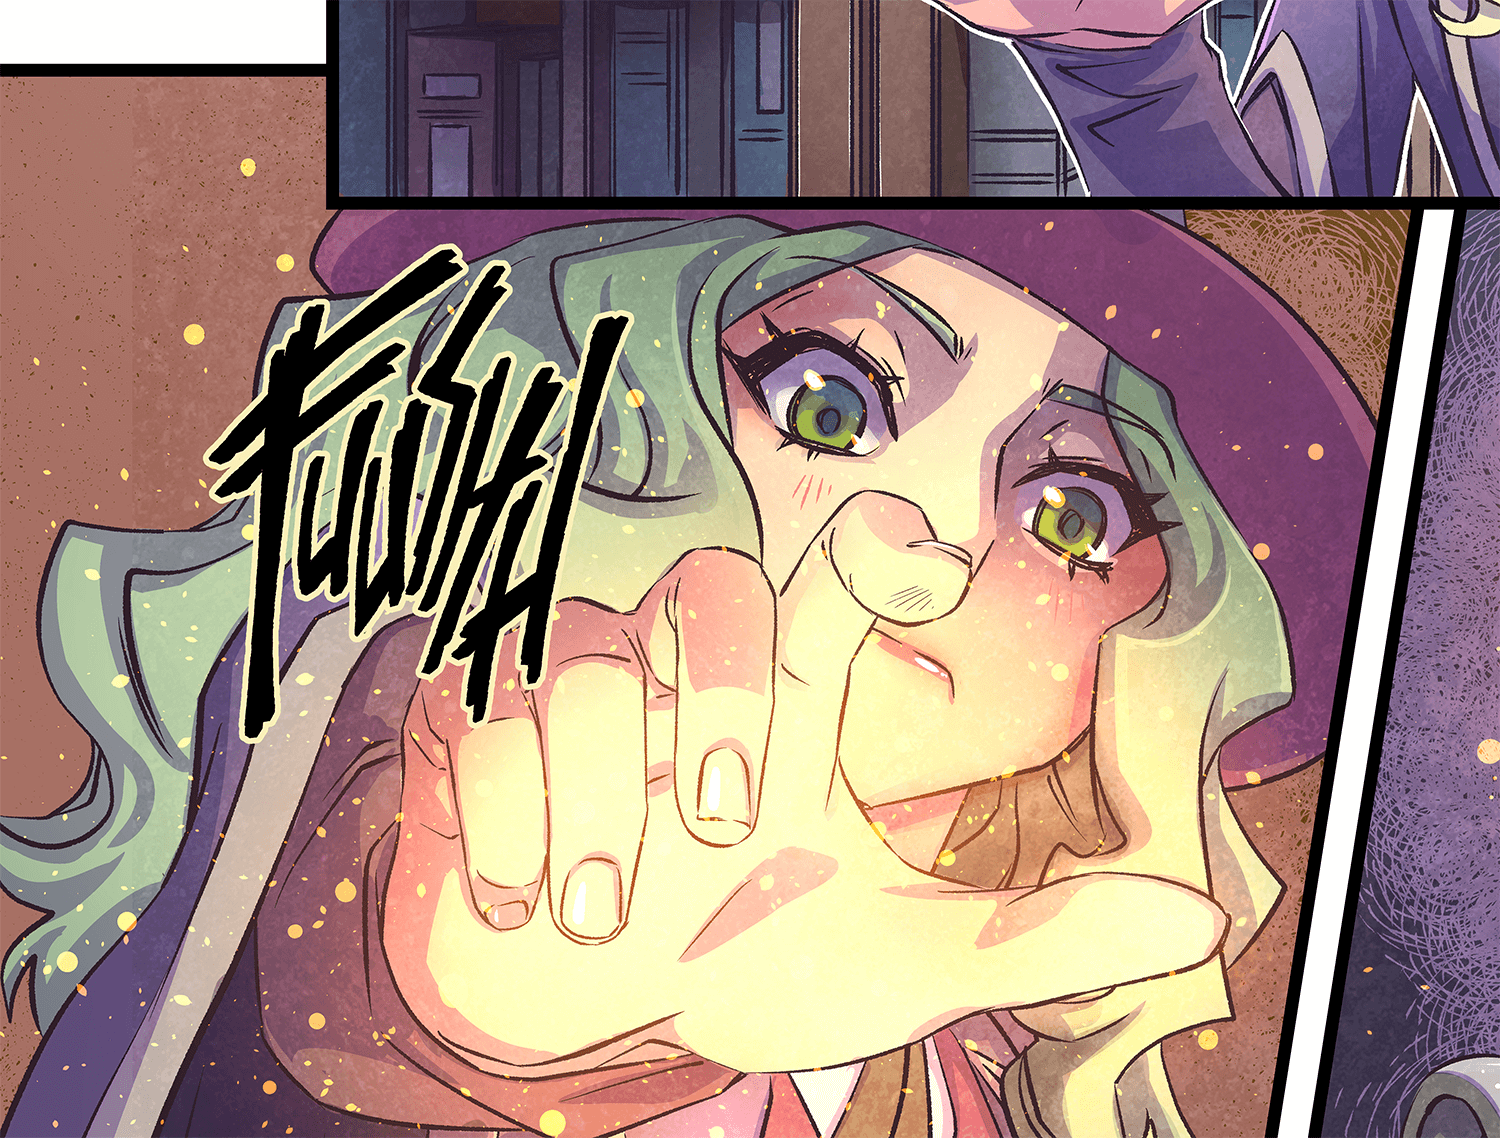
Dialog and sound effects are another important element for your comic or manga. Ideally, you have sketched out the placement of your speech bubbles at the thumbnailing stage to avoid any important elements in the panels being covered up. Dedicated all-caps comic fonts like WildWords or Clip Studio Comic are best for dialog in speech bubbles, but handwriting your dialog into the speech bubbles can also work. Some comic artists prefer to type the text first, as a reference, and then trace over the letters by hand for a more handwritten look.
In either case, remember to keep the font size consistent, even if the speech bubble size is different. As a rule of thumb, try to use no more than 25 words per speech bubble. If you have a lot of dialog, try shortening it or splitting it over multiple speech bubbles and multiple panels.
Sound effects are used to express a type of sound when it is relevant to the story, such as the sound of footsteps, when someone is approaching and it is the first thing a character hears. For effect, an onomatopoeia for a crashing sound may be written in huge jagged letters to convey the intensity of the impact, while a drip sound effect may have small or wobbly letters.
Exporting and Publishing Your Digital Comic Book
Most digital drawing apps like Clip Studio Paint will let you export your project to a wide range of formats including PDF, EPUB, PSD, and PNG. If you’re publishing your comic online to a platform like Kindle Direct, GlobalComix, or your own website, check the file size and format specifications before exporting.
If you’re sending your comic to a printer, check the print margin requirements before exporting your project. Clip Studio Paint allows you to set margins and print marks around your canvases, so that you can place elements correctly without the fear of them being cut off during printing. You can even check a 3D preview of your comic or manga before exporting to check how it will look in a bound format.
It is important that you decide on the format before you start drawing, so you don’t have a finished comic that doesn’t fit the size of the intended platform or any print restrictions.
Ready to create your comic?
Now you know the basic steps to creating your comic or manga with digital tools, all that’s left is to start creating a story that you can be passionate about. As you become more familiar with panel layouts and the process of telling a story through sequential art, you will get more comfortable with the individual steps. It may help you to look at professional comic artists you admire and study their work. Think about what makes their panel layout effective or what made the story leave an impression.
If you don’t have a digital comic creation tool yet, Clip Studio Paint is an excellent app for beginners and professionals alike. Its helpful features include panels tools and speech bubble presets, plus the ability to directly use 3D models and image materials as references when you create your story and level up your art skills..
Your ideas are waiting to be released into the world, so take the plunge and have fun creating your comic!
What Artists Are Saying About Clip Studio
CLIP STUDIO PAINT PRO
for character art, concept art, illustration
CLIP STUDIO PAINT EX
for comics, manga, webtoons & animations
PRO
EX
Single-page illustrations & comics
Multi-page comics/manga & illustrations
Up to 24 frames for gifs or short animations
Unlimited frames for professional animation
Natural, customizable pen and brush tools
Vector layers
More than 10,000 free downloadable brushes and materials
3D models and drawing figures
PSD compatibility
RGB and CMYK compatible
For macOS and Windows
-
Export and print multi-page files
-
Convert images and 3D models into lines and dot shading
Free technical support
Free web services & community
Clip Studio Ask / Assets / Tips / Share


